5 Random Capture One Quick Tips
When working in Capture One last week, I had been thinking to myself: “Self, you must come up with some new tutorials for the kind folks that read your blog” but I just couldn’t come up with anything profound and dramatic. Then I realised that perhaps I was looking in the wrong place, and it occurred to me that many of the little things that I do regularly may not be known by everyone. So, with that in mind here is a random collection of quick little tips that may help your workflow…
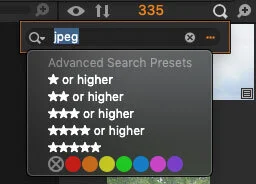
Tip 1: How to quickly filter your images by star or label (or anything else)
If you want to filter the current set of images that you’re working on, the usual way to do it is go to the library tab and click on one of the filter options. This lets you filter by RAW or Jpeg, stars, colour labels and so on. But, what if you’re in the middle of working and you don’t want to go to the library tab?
Well, you can also quickly filter your current set of working images from the film strip. Just click on the magnifying glass icon at the top of the film strip panel. This brings up a search field, and you can select on of the presets for star rating and colour label from the pop-up menu (magnifying glass with little arrow), or you can do a more advanced search here by clicking on the … button.
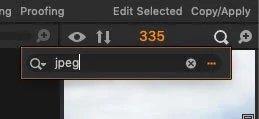

You can also search by typing into the search field. You can actually type “RAW” or Jpeg” into this field and it will filter by the corresponding formats. It saves having to take a trip over to the library tab if you want to quickly search for something or change your search filter.
Tip 2: Creating a new Layer
If you want to create a new layer that you don’t intend using with a gradient, then make sure you choose the option for a new filled layer rather than just clicking on the + button on the layers panel. If you do this and then try and make any adjustments noting will happen. This is because each layer has to have a mask, and the default is to create a layer with an empty mask.
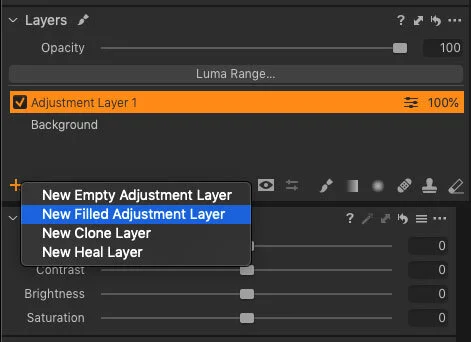
To create a new filled layer, click and hold on the + button on the layers panel, and choose “New Filled Adjustment Layer”. Unfortunately there is no way that I’m aware of to set this behaviour as the default.
If you do accidentally create a layer with an empty mask, you can fix this by right clicking on the layer and choosing “Fill mask”
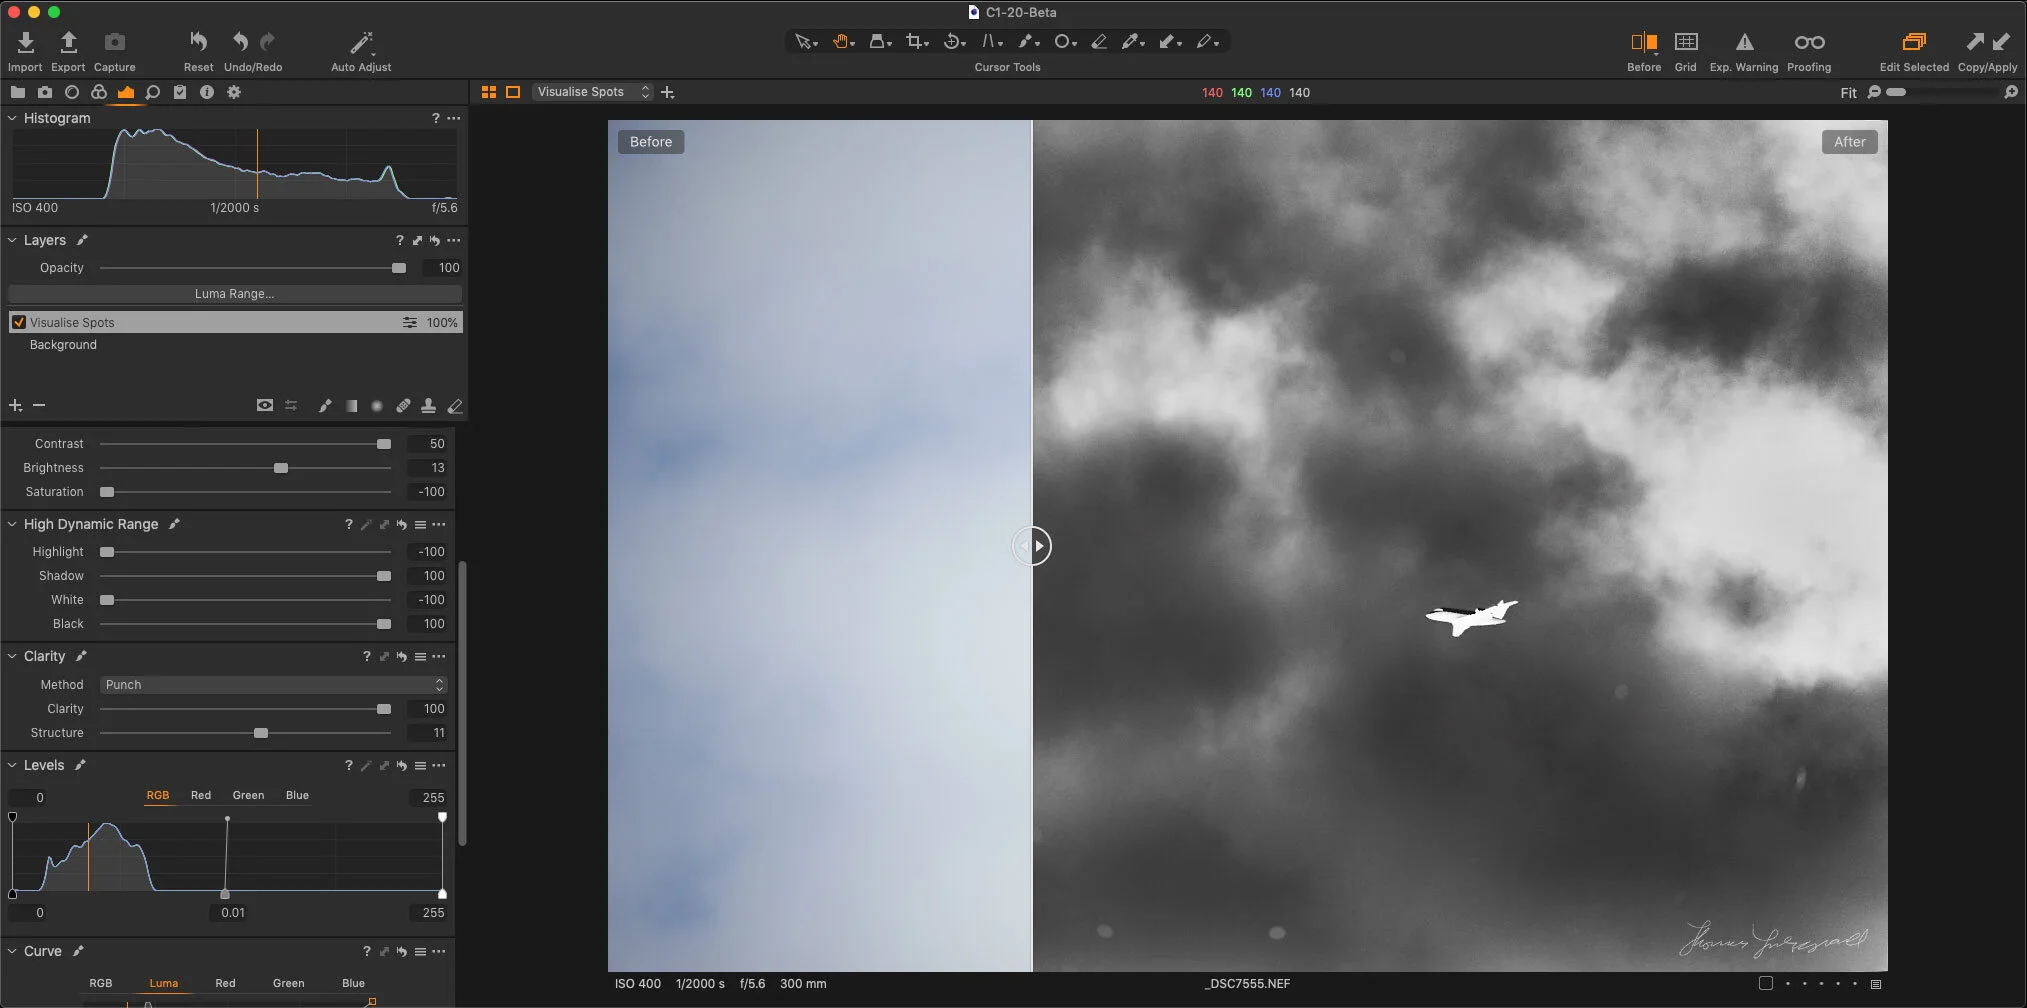
Tip 3: Use a temporary layer to visualise Spots
One of the features of Lightroom that isn’t in Capture One is the option to visualise spots. If you’re unaware of this function in Lightroom, it temporarily increases contrast so that you can more easily see dust spots on your image.
You can easily recreate this in Capture One by using a layer and applying some adjustments to it. There’s a couple of ways you can go about this. You can just increase contrast, or play with the curves or levels until you create a result that allows you to easily see the dust spots. You can then save these adjustments as a style for later use on another image.

When you use the dust removal tools or a heal layer in Capture One it is unaffected by adjustment layers, so once you’ve applied your temporary layer you can use whichever tool you want to remove the dust spots and then, when your finished turn off or delete the adjustment layer.
This may sound overly complicated or longwinded, but it’s really not once you do it once and save it as a style. You could even script this in AppleScript if you’re using this technique on a Mac.
I’ve included the adjustments I created in a style which you can download below. My version inverts the image as well as adjusting contrast. To apply this to a layer, right click on the layer and choose apply style and then locate the style.
Tip 4: Don’t be afraid of Levels
Ever since Lightroom came out and it didn’t have a Levels tool, Lightroom advocates have been trashing the use of Levels as old and archaic. This just isn’t true, and it still has its uses today. In fact, it’s a tool that is well worth learning. I’m not going to get into all that now, but I’m just going to point out one use for it.
If you have a very low contrast image, it can be a super quick fix with the levels tool. While you can drag up the contrast, the contrast slider works differently, as it uses an s-curve, but some time you don’t want to do this. Sometimes you just want to compress the actual image data in your image, and for this, levels is perfect. All you have to do is drag the black and white points in till you reach the edges of the histogram. You can adjust the overall brightness with the centre slider. Here’s an example:

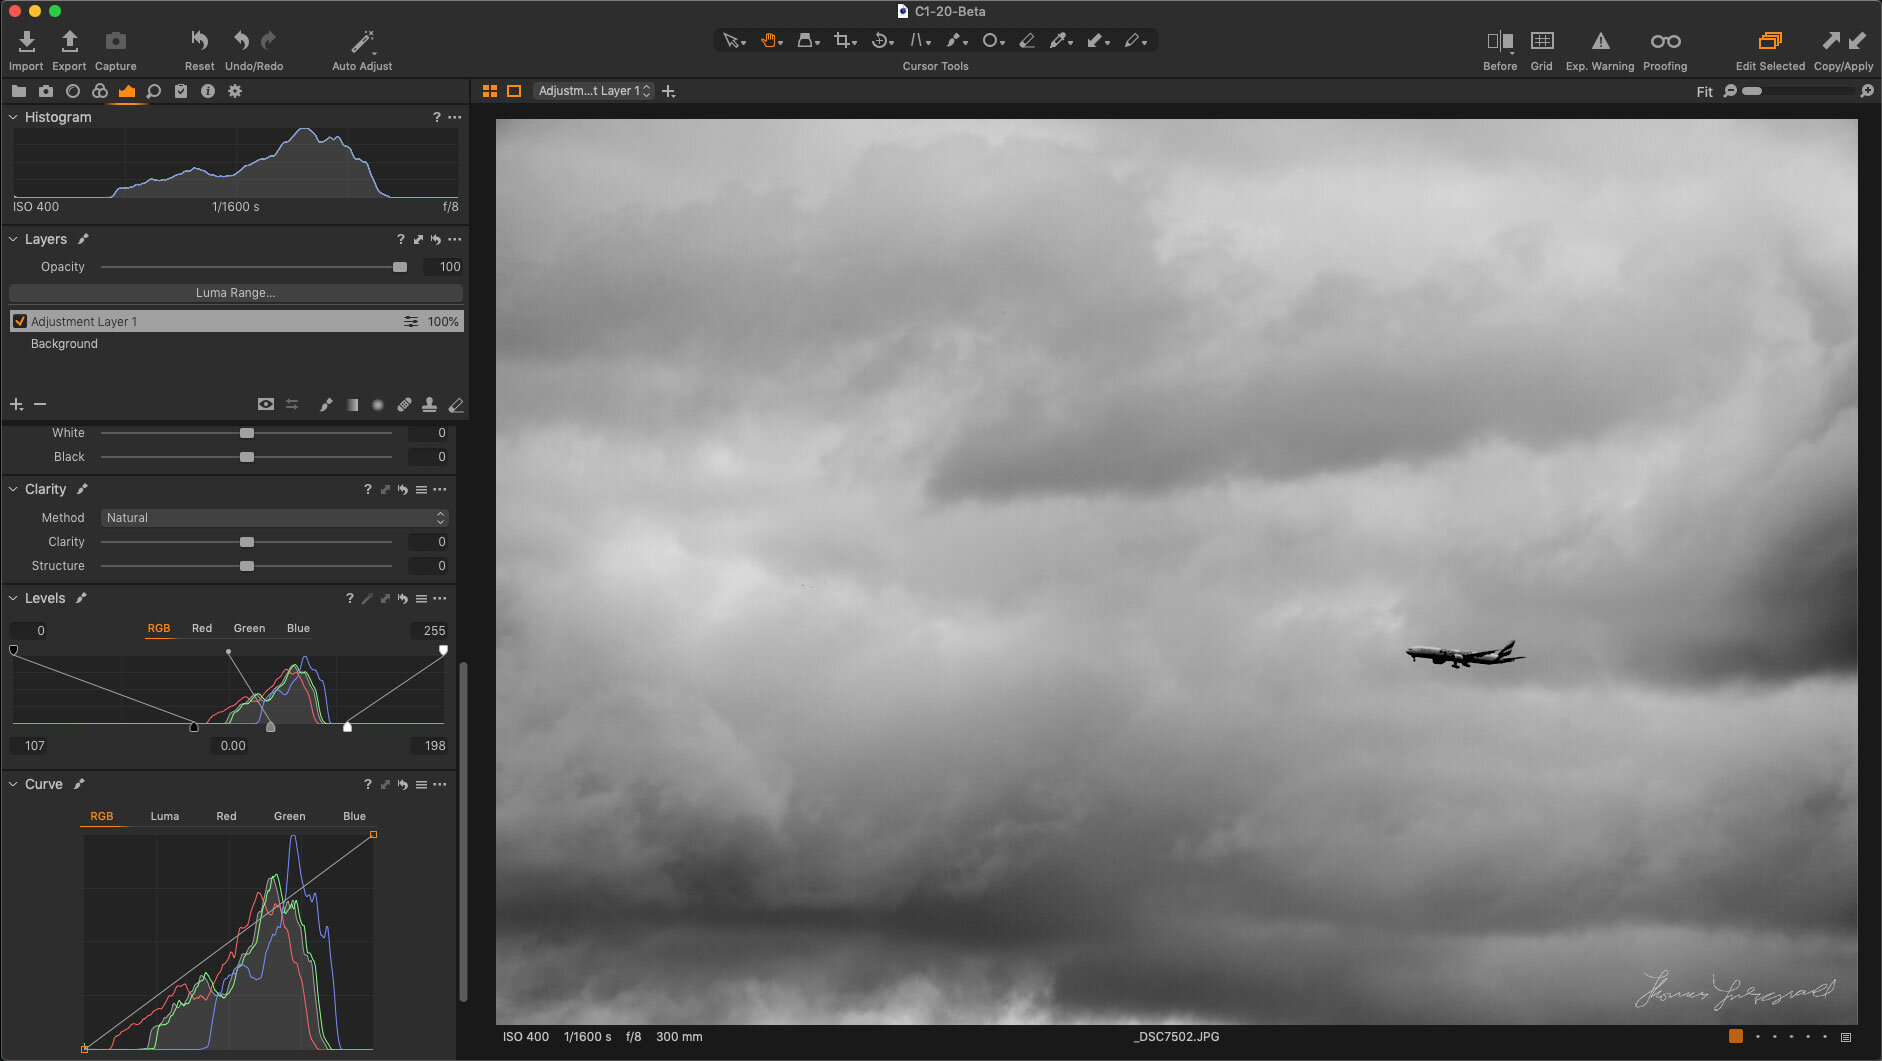
Of course, one of the benefits of Capture One is that there are multiple ways of doing a lot of things, so I’m not saying hat this is the best or only way, but it’s a handy thing to know about, and you shouldn’t leave it off your list of go-to tools just because it’s not in Lightroom.
Tip 5: Change the keyboard Shortcuts for Labels
I regularly use colour labels in Capture One, and Lightroom, as part of my sorting regime. And, no matter how much I try, I just can’t get over the muscle memory of using the “6” key to set the colour label to red (in Lightroom). Luckily there is a quick solution to this if you’re having the same problem remembering the official keyboard shortcut, and that is to change it.
In capture one, go to the Edit menu and choose Edit Keyboard Shortcuts and then when the window opens, search for "red" and under colour tag: red, change the shortcut to 6.

You can repeat this for the other labels if you want (personally, I mostly just use Red). Now I don’t have to fight against my instincts every time I’m using Capture One. (It would probably help if I din’t use Lightroom still, but if you’re going back and forward between both, then this is a simple way to avoid frustration).
Help Support the Blog
This blog (and my YouTube Channel) are my full time jobs, and are supported entirely by sales of my eBooks, presets and by support from readers like you. If you want to help keep this going then you can do so by…
Buy me a coffee / Tip Jar**. If you want to support the blog, you can buy me a coffee via PayPal with a one off donation to my PayPal tip jar.
You can support me on Patreon. If you like what I do here and find the information useful, then you can help by subscribing to me on Patreon
You can also show support by buying something from my from my Digital Download Store where I have Lightroom Presets, and e-books available for download. If you're a Fuji X-Trans shooter and Lightroom user, check out my guide to post processing X-Trans files in Lightroom. I also have a guides for processing X-Trans files in Capture One and Iridient Developer. For Sony Alpha shooters I have a new guide with tips on how to get the best from processing your A6000 Images in Lightroom.
If you like this post then you can see more of my work on Instagram, Twitter and Facebook. I also have a YouTube channel that you might like. You should also check out my other Photography Project: The Streets of Dublin. If you want to get regular updates, and notices of occasional special offers, and discounts from my store, then please sign up for the Newsletter.