

Three Ways to Set Black Levels in Capture One
If you're using Capture one and you're used to using other applications such as Lightroom, you may have noticed that there is one control missing in Capture One's set of adjustments. That control is "Black Levels" . However, while there is no direct "Black Level" control in Capture one, there are actually several ways you can adjust the black levels in the software. Here are three methods that I currently use.
The first two methods will work in any version of Capture One, but the last one will require Capture One 8 (or higher).
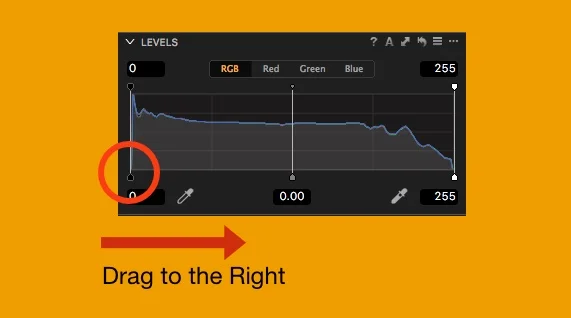
Method 1: Using the Levels Control
The first method is very straight forward, especially if you've previously used Photoshop. Using the Levels controls in theExposure tab, drag the bottom left hand slider to adjust the black point and crush the blacks.
This simple method will allow you to compensate for images which have flat blacks or have raised black levels.
You can adjust the input value, which is the top triangle on the curves control, which will raise the black levels. It may result in clipped data depending on your file, but it seems to work with Raw data, and will allow you to recover clipped blacks to an extent. If you're working on a Tiff or Jpeg it will clip immediately.
Method 2: Using the Curves Adjustment
The second method works similarly to the first method, and that is to use the Curves control. By dragging the left hand most point on the curve to the right, you are adjusting the black levels.
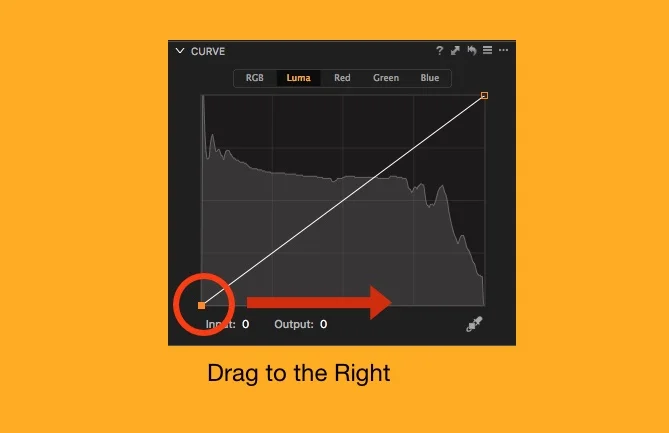
The same caveats apply as using the Levels control though. Raising the black point will clip after a while, depending on the amount of information in the raw file. As with the levels method, if you're working on a Tiff or Jpeg it will clip immediately.
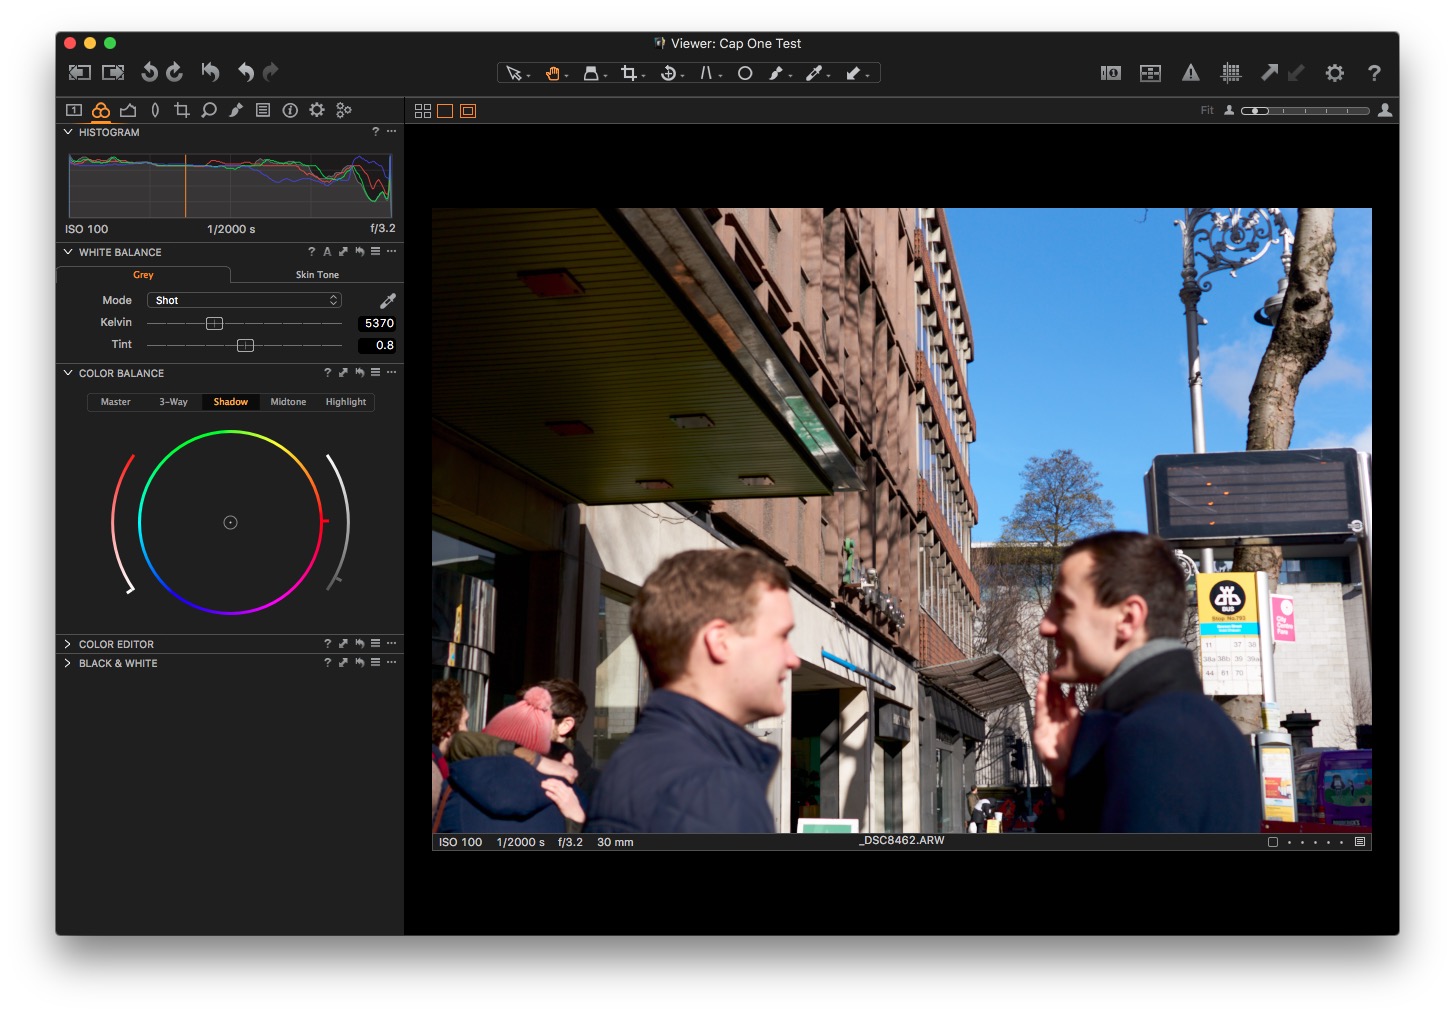
Method 3: Colour Balance Tool (3 Way Colour Corrector)
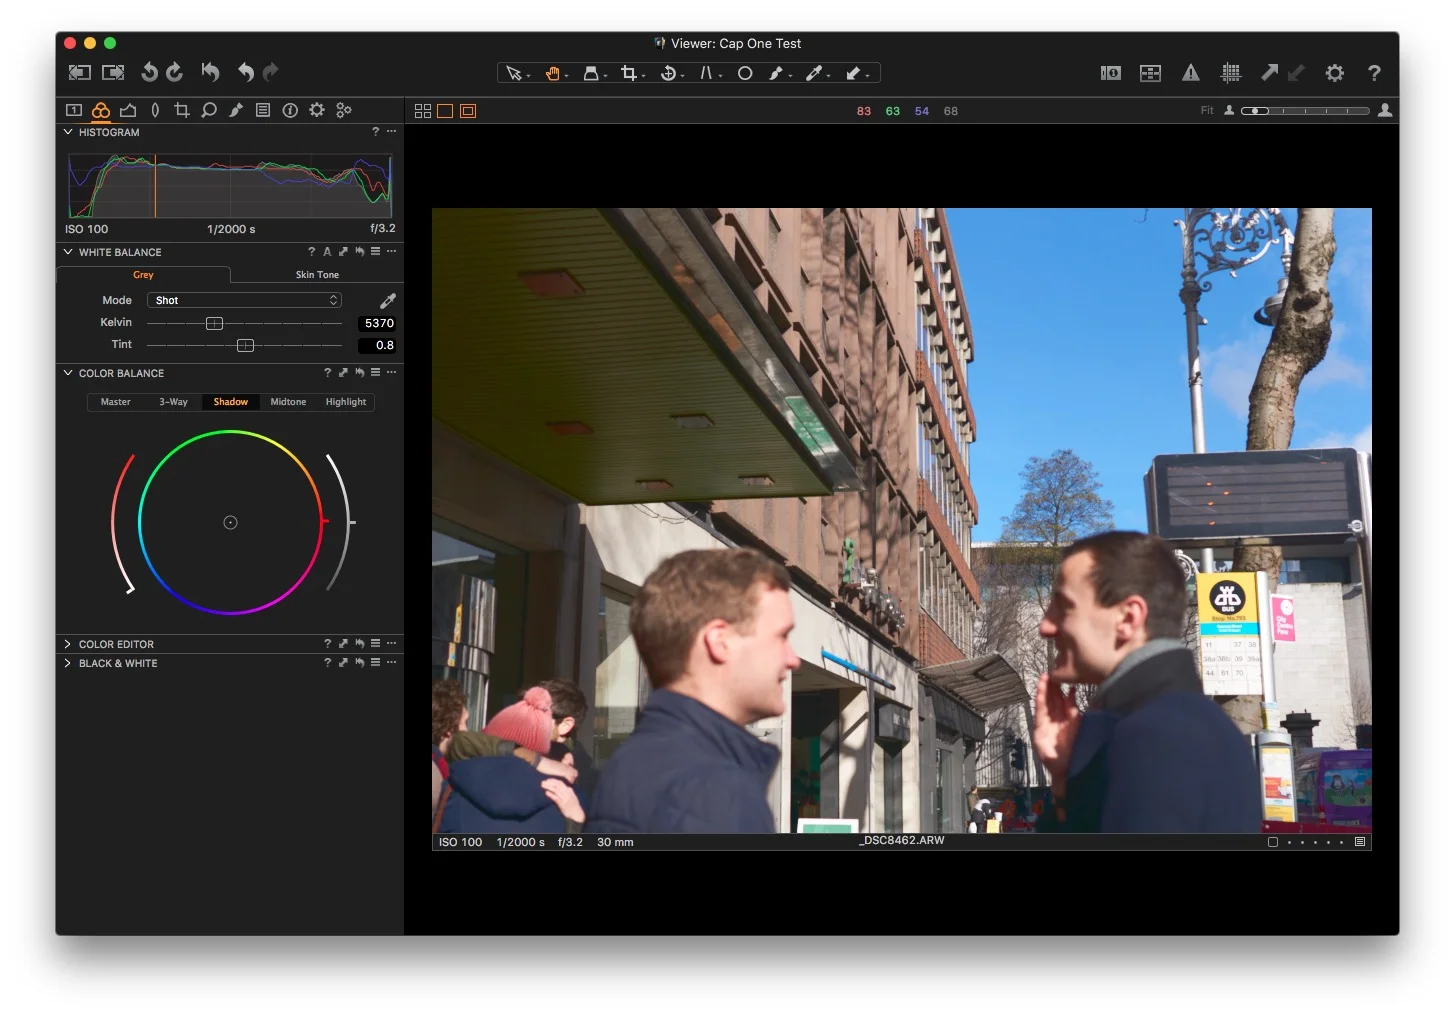
The third method requires Capture One 8 or higher, but is actually my preferred method. This involves using the colour balance tool, which is also commonly known as the 3 way colour corrector. On the Colour tab, under the Colour Balance tool, select either 3-Way or Shadows. Using the Shadows sub tab gives you a bigger control to work with, and that's what I'm using here to demonstrate. If using the 3-Way controls, you will be working on the left hand most set of controls, labelled "Shadows".
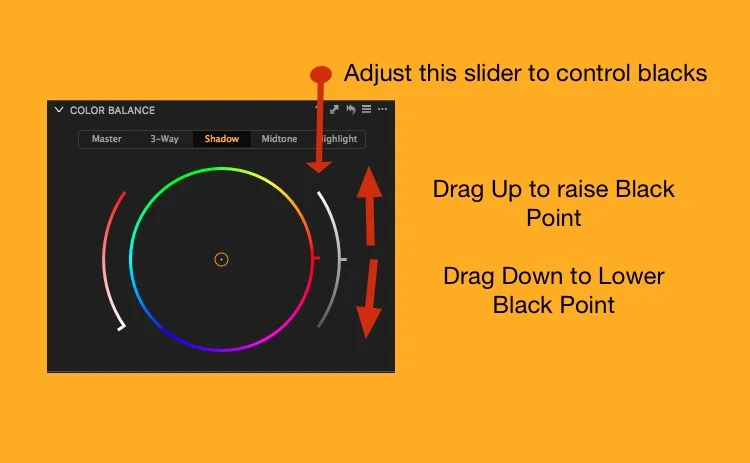
In this tool there are 3 main controls. On the left is a saturation control, or controlling the saturation of the effect, in the middle is the main colour adjustment control, which you use for tinting the shadows, mids or highlights (in this case shadows) and on the right is a levels adjustment slider, which will increase the brightness in which ever control you're using, again, in this case, the shadows.
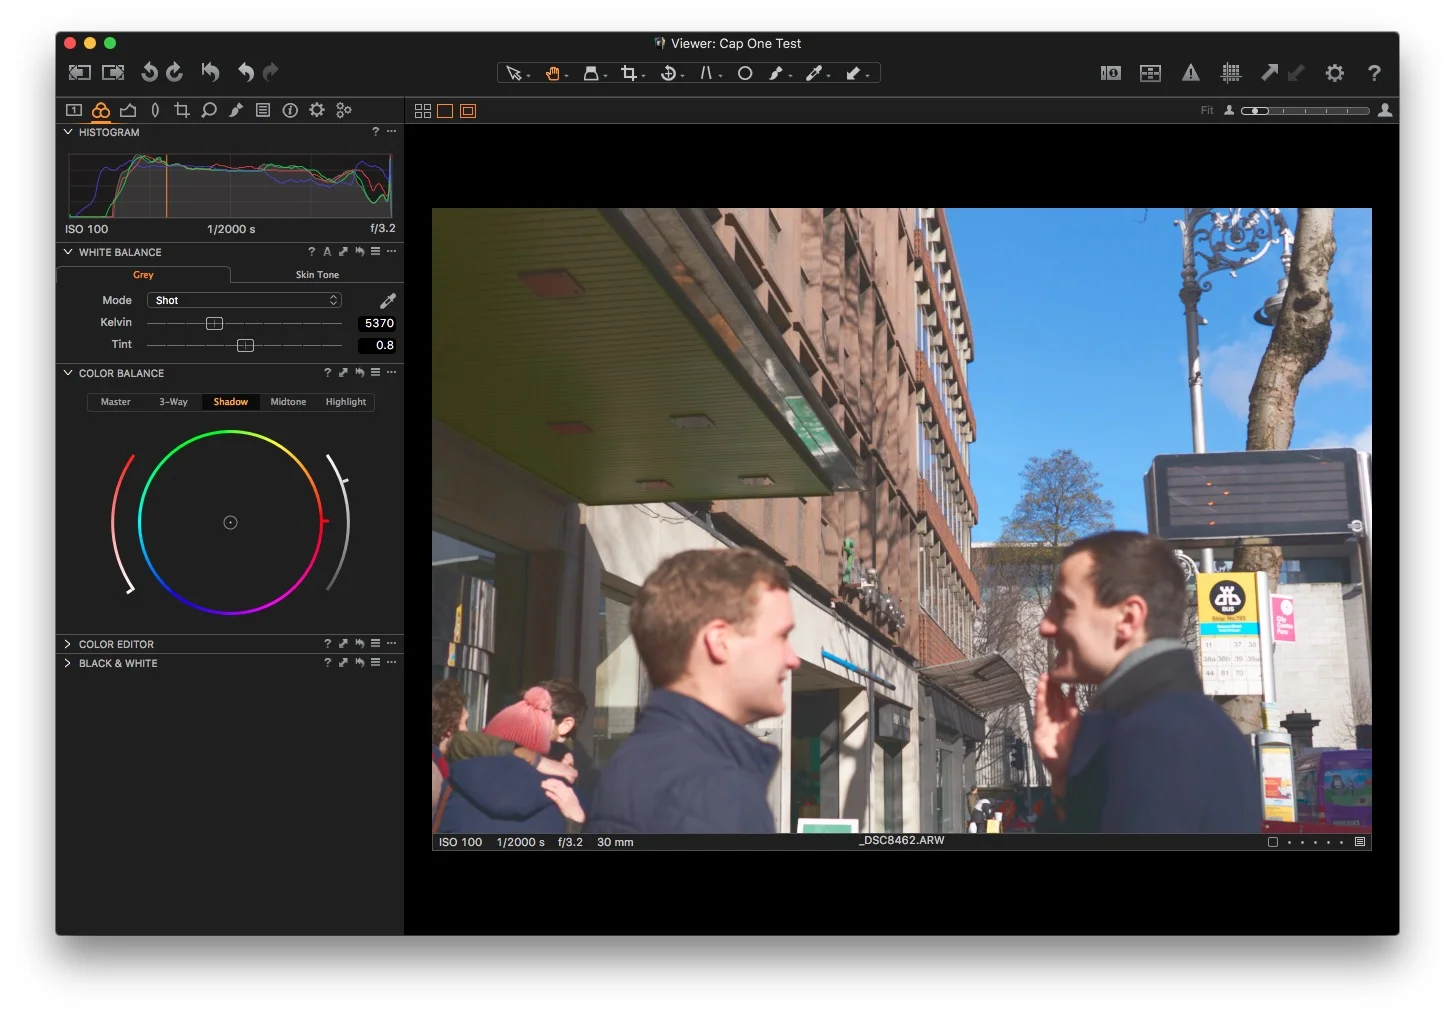
Dragging this slider down, will decrease the black point and crush the blacks (i.e make them darker). Dragging this control up, will increase the black point and make the blacks brighter.
To reset this control, simply double click on the handle.
There you have it. Three simple ways to control the black levels in Capture One. You may be wondering what the difference is between this and using the shadows slider to recover shadows. Well, the shadows slider, will only increase shadows, and also, it works slightly differently. The shadows slider is designed to increase the shadow brightness without actually changing the black levels. Usually when you need to adjust black levels you're trying to bring them down rather than up, and so this wouldn't work for that.
By the way, if you're using Capture One for processing X-Trans files, and you haven't seen it already, I have a short guide detailing my methods and settings for working with Capture One.

Help Support the Blog
If you want to get regular updates, and notices of occasional special offers, and discounts from my store, then please sign up for the Newsletter.
All of the work I do here, and the information on this blog is done entirely free of charge and takes up quite a bit of work. I want to spend more and more time on this blog, and offer more and more of this kind of information, tips and so on, so If you like what I'm doing here and want to show support, then you can do so by buying something from my Digital Download Store
I have Lightroom Presets, Photoshop ACR Presets, Textures and e-books all available for download.
If you're a Fuji X-Trans shooter and Lightroom user, check out my guide to post processing X-Trans files in Lightroom. I also have a guide for processing X-Trans files in Capture One


