A Super Nerdy Lightroom Colour Grading Tool Trick to Solve a limitation of the Curve Tool !
This is one of those tips, that I actually exclaimed out loud when I realised it, but I’ve struggled ever since to figure out how to write about it. The reason is that it’s kind of a very specific nerdy thing, and while I was very excited when I discovered it, trying to figure out a way to explain why you should be excited too, has eluded me. The thing is, for years I’ve had a very specific problem in Lightroom, and there’s been no way around it, until recently. So what is this problem? Read on for more.
If you have ever used the curves tool to try and mimic a film effect you have probably noticed this problem. A common technique when creating a film like effect (or “cinematic” effect to use the more common vernacular these days) is to use a tone curve with the blacks raised and the whites lowered. You would do this to mimic the more gentle roll off of film (Film’s not actually not really like this - but it’s become accepted as the way to do it). If you look at some of the Cinematic presets that are included in the new version of camera raw and Lightroom, you can see many of them use this type of curve.
So what is the problem?
Well, when you use a curve like this, you may end up with blacks or whites becoming too grey. You might want to fix this, but you don’t want to adjust the tone curve, as you like the results apart from the black and white levels. The problem is, you can’t adjust the black or white sliders in the exposure panel, because this will still lead to clipped blacks and whites. If you look at the histogram when doing this you can clearly see where the hard “brick wall” is. The reason for this is that Lightroom generally evaluates its adjustments from the top down (unless you rearrange them). So because the various exposure controls happen before the curves, there was, until recently no way to adjust this.

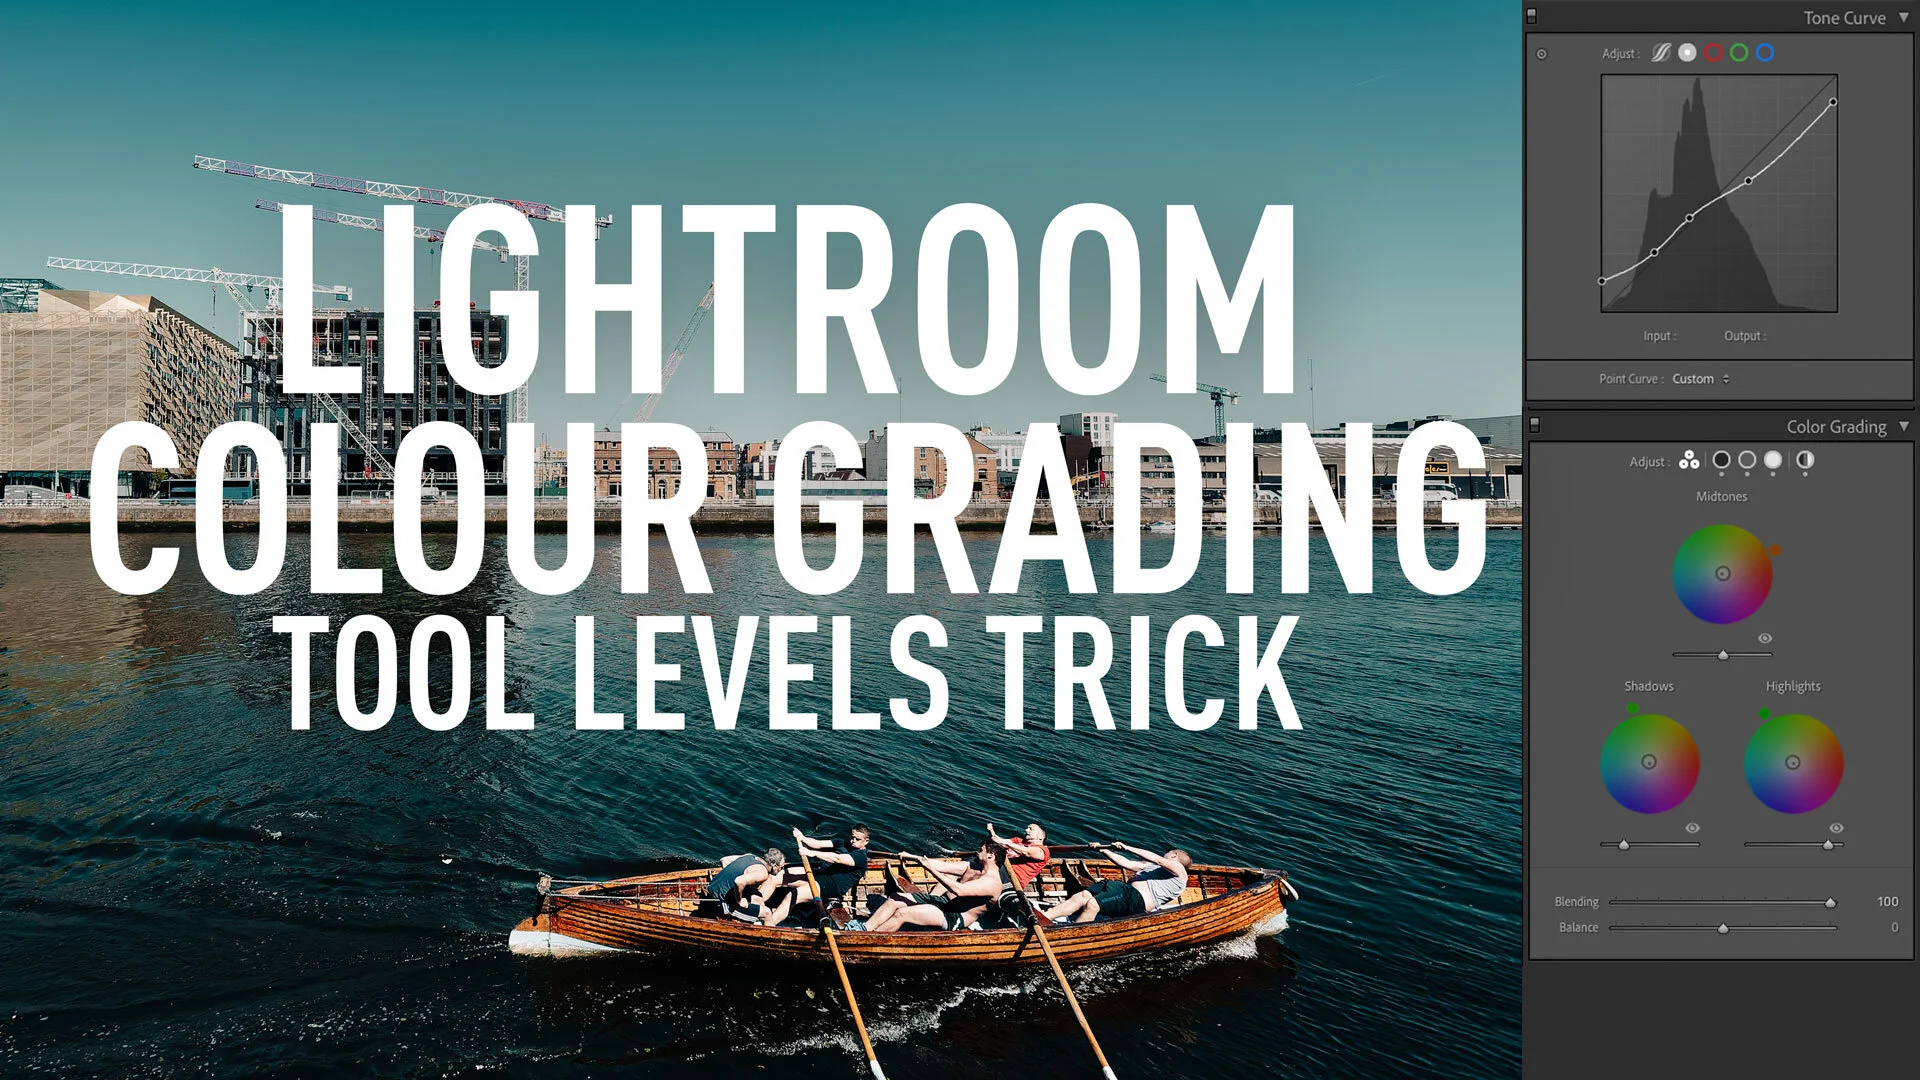
A tone curve in Lightroom with the black point raised and the white point lowered
Enter the colour grading tool.
While you might thing of the colour grading tool as primarily a way to tint the shadows and highlights, you can also adjust the luminance of the shadows, highlights and mid-tones separately. And, because it’s after the curves tool, you can adjust the raised black and lower white levels of this type of tone curve. In essence it’s like having a levels tool after the curves too. While these sliders can only go so far, and there are some cases where you still won’t be able to correct for certain types of tone curves, at least now it’s actually possible inside of Lightroom. The results you can get from this are actually quite unique too. You can do a complex tone curve with subtle fall offs on both ends of the curve, and still get proper black and white points.

Colour grading tool with a luminance adjustment
To adjust the luminance of the shadows and highlights using the colour grading tool you simply use the slider beneath the colour wheels. To adjust the shadows, to compensate for the blacks being raised, simply drag the appropriate luminance slider down (to the left). To work with the highlights, to adjust for the white levels, drag the corresponding slider to the right.
While this isn’t something you would want to do all the time, its a very handy feature to have. I’m not joking when I say that I’ve wanted something like this for years in Lightroom. It actually never occurred to me that this would even work like this until I figured it put by accident. Once I did, I realised how obvious this was, and then I was kicking myself for not figuring it out sooner!
Help Support the Blog
Patreon
If you like what you see here and you find this useful, then you can help support this blog and help me keep making great content like this by supporting me on Patreon for as little as $1 a month. There are a number of options available with different rewards, such as behind the scenes content, special Patreon only videos and more. Check out my Patreon Page for more details, and a big thanks to everyone already supporting this blog on Patreon.
Buy me a coffee!
If you’d rather not use Patreon, but still want to say thanks or help, then you can feed my caffeine habit and buy me a coffee via PayPal with a one off donation to my PayPal tip jar.
Join our Facebook Group
If you want to discuss anything you’ve read here on my website, or saw on my youtube channel, or if you want to share images you’ve created using any of my techniques or presets, then I’ve started a new Facebook Group just for that.
Note that this post contains paid affiliate links. We get a small commission for purchases made through these links, which helps run this site.