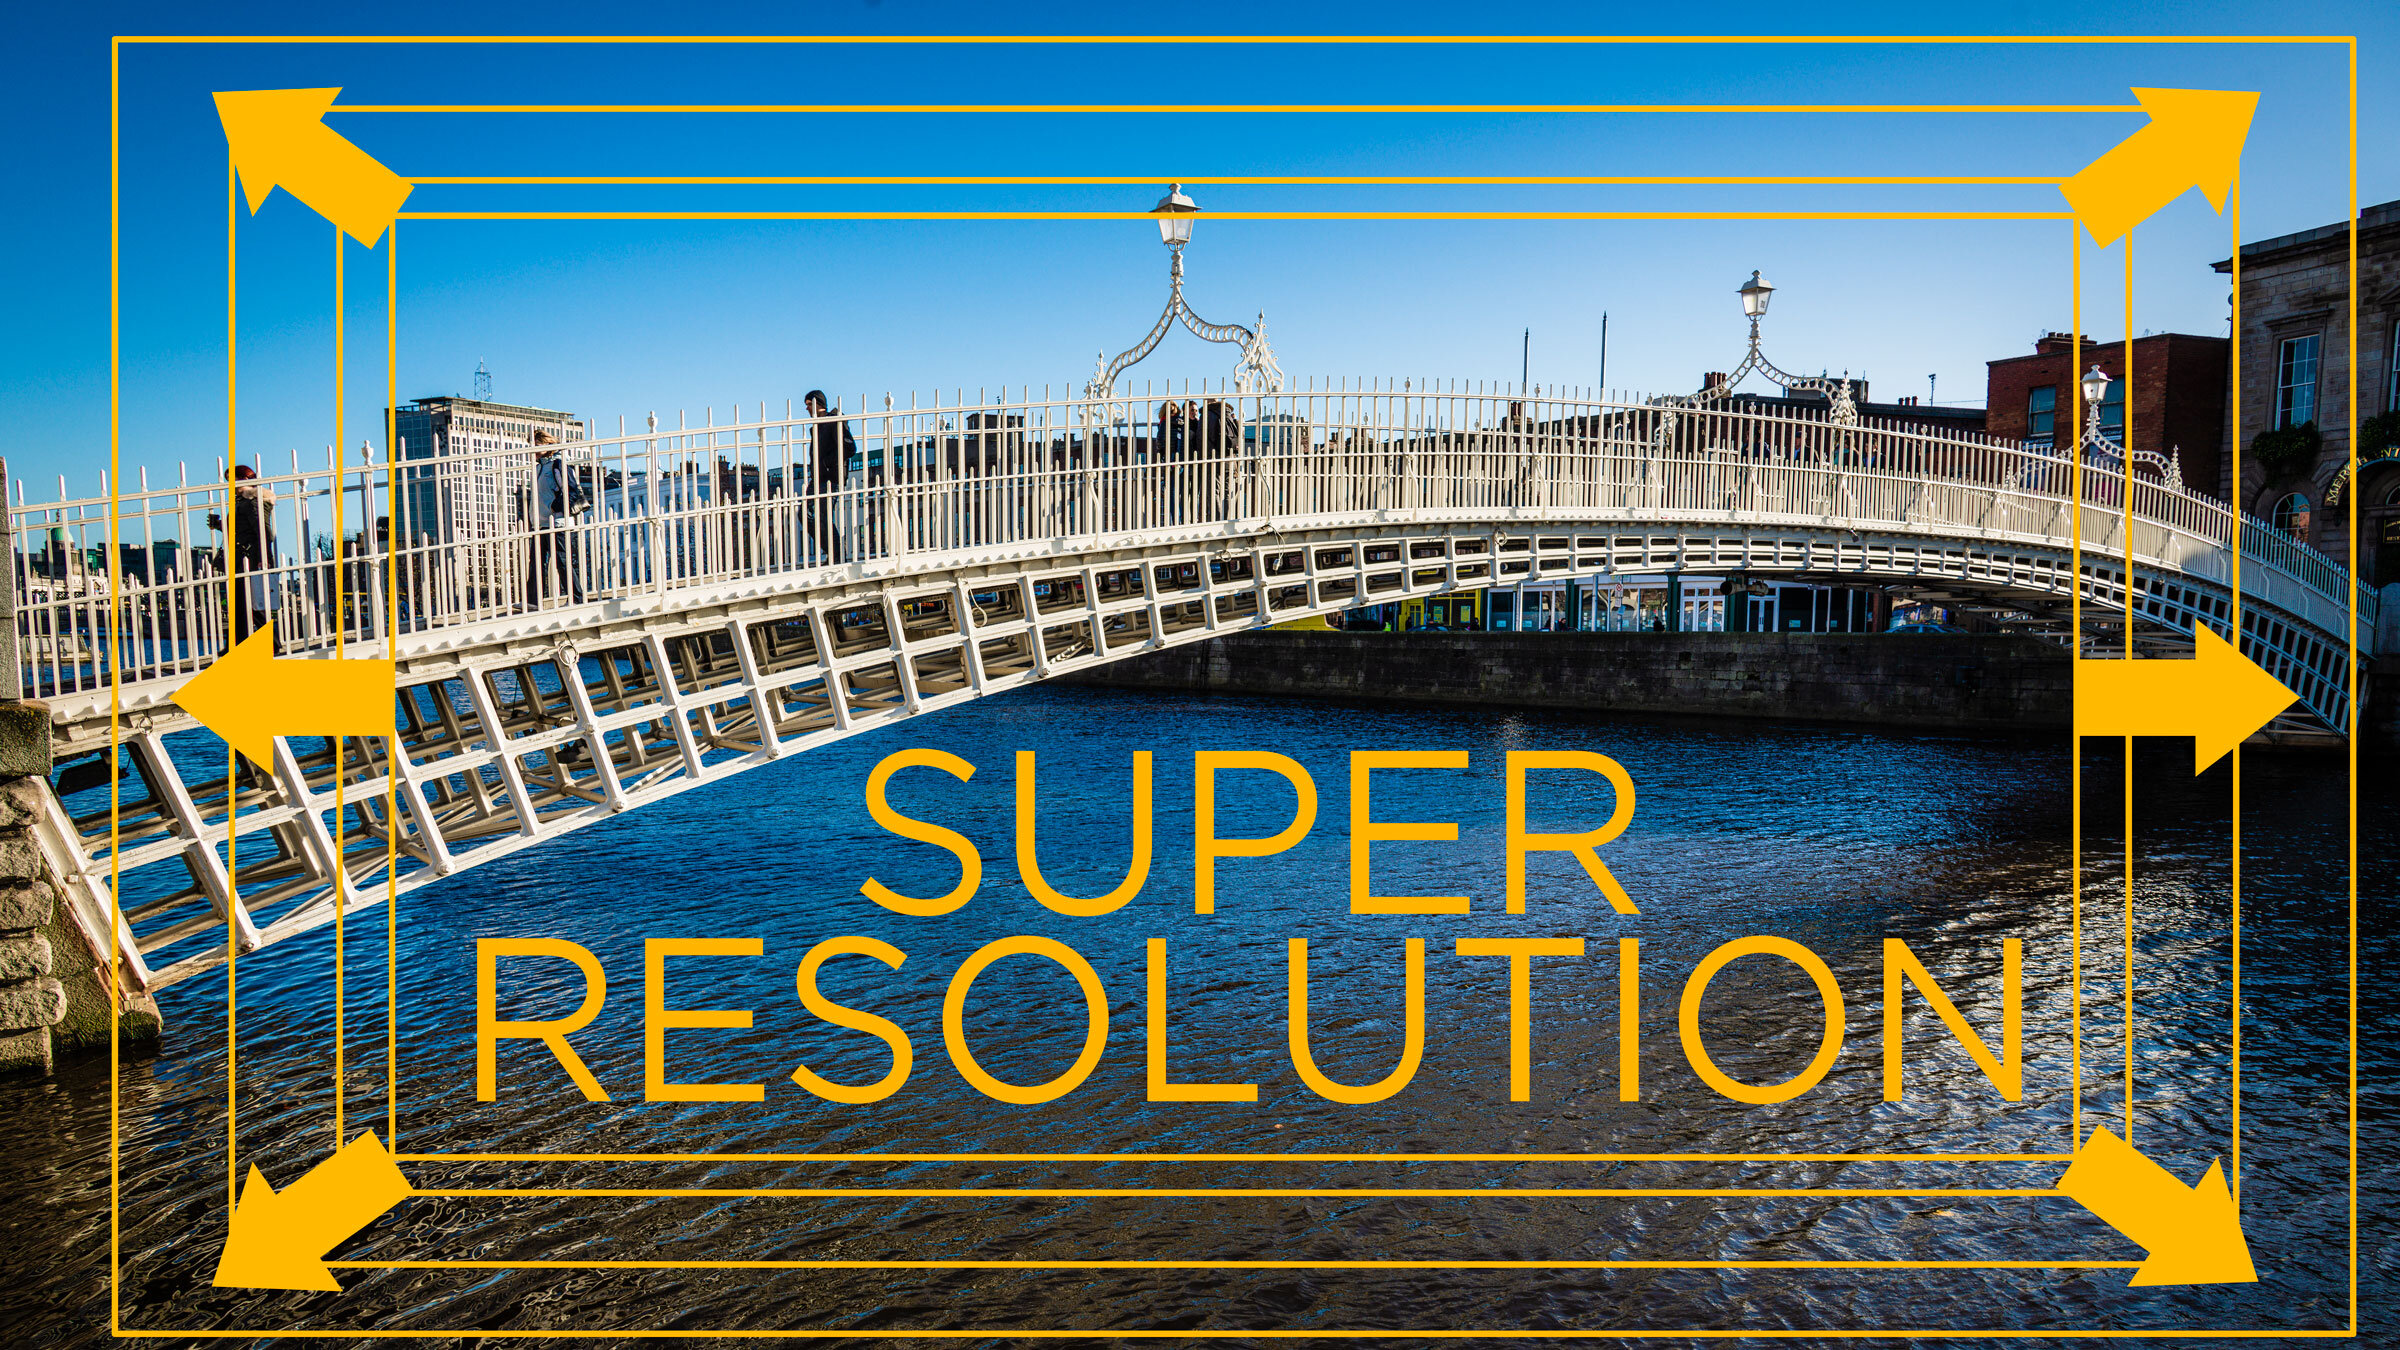
Adobe’s new “Super Resolution” in Camera RAW- What it is, what it is not, and tips for use
Ever since the most recent update (at the time of writing) to Photoshop included the new “super resolution” feature in Camera Raw there has been a lot of discussion, and an equal amount of misinformation about this feature. In case you missed it, “Super Resolution” is Adobe’s new method of upscaling a file using artificial intelligence to give a superior result to previous methods. There has been some wild claims about this online, including some claims that it doubles the resolution of your camera, and that you no longer need to buy a high megapixel system, as this is just as good. In this article, we will take a look at “Super Resolution”, discuss its actual usage case, and talk about some tips on how to use it.
What is Super Resolution
Super Resolution is a new method of up-scaling an image in Photoshop that can be found inside of Camera Raw. It uses artificial intelligence to calculate the best method of scaling, and to reduce artefacts, and gives a much better result than traditional scaling methods in Photoshop.
Using AI for this kind of thing isn’t new or unique to Photoshop. Topaz labs has a popular plug-in that does the same kind of thing. What makes super resolution different is that it does it as part of the “Enhance” feature (previously called “Enhance Details” and creates a linear DNG file that still acts and behaves like a RAW file. This means that you can still recover highlights, change the white balance and so on, just as you would any other raw file.
When you use Super Resolution it basically doubles the resolution of your image (technically making it have 4 times the number of pixels). So, a 4000 X 4000 image would become an 8000 X 8000 image and so on.
How to use Super Resolution
To use Super Resolution, you must first open a file in Camera Raw. This doesn’t have to be a RAW file, but you must open the file in Camera Raw rather than using Camera RAW as a filter on a layer.
Once inside of Camera RAW, right click on the image and choose “Enhance”. Note that this replaces the older “Enhance Details” command. This brings up the enhance dialog box which has two options: “Raw Details” and “Super Resolution”.
Raw Details is the same as what was previously known as “Enhance Details”. This uses AI to improve the demosiacing quality of your image. On normal RAW files, the effect of this can improve the rendering of certain edges and artefacts in RAW files. For Fujifilm RAW files it significantly improves detail rendering and gets rid of the infamous worm artefacts and detail smudging. You have to have this checked in order to use super resolution, and if you uncheck it and then check the tick box for super resolution, it will recheck “Raw Details”.
Once you’re ready, just click “Enhance” to begin the process. Super Resolution will double the linear resolution of your file (width and height) for quadruple the number of pixels. So, for example a 12mp file will now have the resolution of a 48mp file, and so on. The length of time this takes will depend on your computer and GPU. On my new MacBook Pro with Apple Silicon, a 12 mp file takes about 3 seconds to render into a 48mp DNG.


Camera RAW will output a DNG file into the same folder as the original raw file, and it should show up in the filmstrip of the Camera RAW window. Note that it is not selected by default, and your original RAW image will remain selected. Even if you do nothing else at this stage the DNG is already saved to disk, but you can now select it and continue to edit, or open the upscaled image in Photoshop.
Why should and shouldn’t you use Super Resolution
So, what are the use cases for Super Resolution. There are two main reasons for wanting to use this technique:
- You want to print at a large size
- You need to crop in tight on an image that is of a low resolution.
These are the only real reasons for using Super Resolution in Photoshop. It won’t improve the level of detail sin your file, and despite what you may have read it won’t turn your 24mp camera into a 48mp camera.
A higher resolution sensor can capture more detail to begin with and there’s more to a sensor than just resolution. Many higher megapixel sensors also have different dynamic range, and may render tonality differently, and have different responses at different sensitivities. Super resolution takes the same image and just makes it bigger. If anyone is claiming that using Super Resolution is the same or better than buying a higher resolution camera, you should not believe them.
Unfortunately, the click bait nature of YouTube and Google Algorithms is leading to a glut of such claims. I’ve tried this on lots of images, and it doesn’t magically improve the original. Don’t get me wrong, it’s very, very good at what it does, and I’ve been extremely impressed. If you need to make a large print from an older file, it will absolutely be much better with this new feature. Also, the better the file you give it to start with, the better the final result is.
The only times you should need to use this are when you want to print at a larger size than your camera normally would be suitable for, and if you need to crop in on a smaller resolution image.
For example, I recently took a picture of an Egret wading in a stream on a walk near to where I live. I only had my old Fuji X-E1 with me, and a 35mm lens, but the bird was far away. Cropping this normally would have lead to a very small low resolution image, but using Super Resolution first allowed me to get a crop and still have a descent final file size for viewing on screen. It’s not as good as having a better camera to begin with, or having had a zoom lens, but it saved an otherwise useless image. The final result was just for friends and family, and I didn’t even post it on social media, but the feature was still helpful in this situation.


The Results
So is it any good? Yes, absolutely. They are definitely better than just upscaling using the normal processes. I don’t have the Topaz plug in to compare it to, so I can’t do a comparison, but it’s a reasonably good result.
It’s not perfect though. It will create smooth edges on diagonals that would otherwise be jagged and aliased, without over softening, but you can still tell it’s been processed in many cases. If there are artefacts in the original image it will upscale these too.
The bigger issue with it is that it also will upscale any grain or noise in the image, and this is another reason why you can’t compare it to a higher megapixel sensor. In a higher megapixel sensor the grain may sometimes be more per pixel, but it will have a lower amount of noise overall. The noise will also be smaller, but with super resolution, you’re making the grain bigger. It does a good job of upscaling the noise, and you don’t end up with a pixellated mess, but the grain is still there and also scaled up. It can be a bit distracting.
A Tip to Improve Quality


A quick way to solve the afore mentioned grain / noise upscaling problem is to apply a greater amount of noise reduction, and then add grain back into your image. With the file now at a higher resolution, you can get away with applying more noise reduction than you would be able to get away with at a lower resolution, and while this will still soften your image to a degree, you can then use the grain controls in Camera RAW to add some noise back into the image, but keep the size of the grain smaller. This will look much better than upscaled grain or noise.
In fact, you should probably tweak the settings after you upscale the image, because higher resolution files often need different settings for things like sharpening, texture and noise reduction.
As mentioned earlier, the better the file you start with, the better the result. For example, I tried on lots of photos from my old Nikon D700, and they were fine, but nothing spectacular. You could really see the upscaled texture of the grain in the original images and so on. However, trying with an mage from a D800, which created a whopping 145mp file, wich was nearly 500MB in size, looked much better for some reason. Because there’s more detail to start with, it has more information to use when interpolating for the upscaling process. You could in theory then just downscale this back to something more reasonable, like a 64mp fieldworker in photoshop should you need to.
Summary and Conclusion
There is no doubt that this is a powerful technology from Adobe, and a great use of AI. While the workflow is a little involved at the moment if you’re a Lightroom user and want to process a lot of images, the technology is coming soon to Lightroom too.
If you need to print large images, or if you want to crop in close, this will be dramatically better than the older techniques, and I’m really impressed with how well it does.
It’s not perfect. There are times when you will still get weird artefacts in the scaling process. It doesn’t seem to like certain areas of high contrast, and it can upscale grain and noise in an ugly fashion sometimes too.

Original - Not Scaled
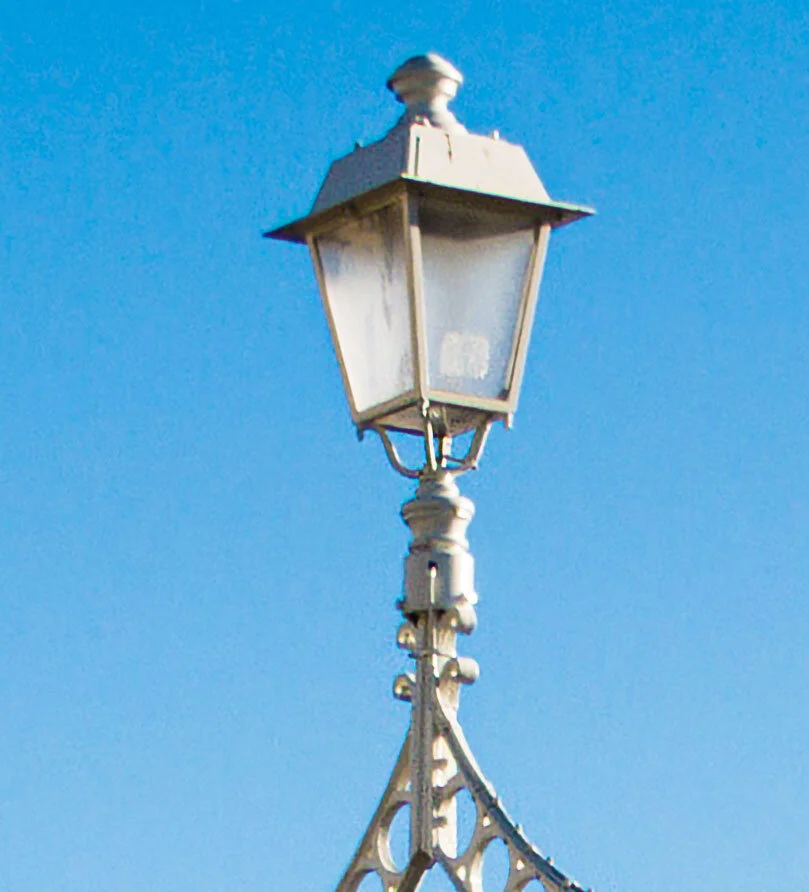
Super Resolution Upscaled - Note artifacting and enlarged grain around the lamp
I look forward to getting some large prints made to try this out properly, and that will be the real proof, but what I’ve seen so far is quite an achievement. I would ignore the hyperbole about this feature though, and just focus on what it does and what it is actually for. For this cases, it’s a great addition to anyone’s toolset.
Help Support the Blog
Patreon
If you like what you see here and you find this useful, then you can help support this blog and help me keep making great content like this by supporting me on Patreon for as little as $1 a month. There are a number of options available with different rewards, such as behind the scenes content, special Patreon only videos and more. Check out my Patreon Page for more details, and a big thanks to everyone already supporting this blog on Patreon.
Buy me a coffee!
If you’d rather not use Patreon, but still want to say thanks or help, then you can feed my caffeine habit and buy me a coffee via PayPal with a one off donation to my PayPal tip jar.
Join our Facebook Group
If you want to discuss anything you’ve read here on my website, or saw on my youtube channel, or if you want to share images you’ve created using any of my techniques or presets, then I’ve started a new Facebook Group just for that.
Note that this post contains paid affiliate links. We get a small commission for purchases made through these links, which helps run this site.