Adobe Camera RAW gets a much needed makeover
I almost missed this from the announcements yesterday, but Camera RAW in Photoshop has gotten a big makeover. It now behaves and looks a lot more like Lightroom. Some of the old frustrating behaviours are gone and it now supports high resolution displays properly.
A Much Needed Makeover
Camera RAW has been around for a long time now, predating Lightroom. While it regularly receives updates, the overall interface hasn’t really changed a massive amount over the years. When Lightroom came along, its underlying engine was based on Camera Raw, and you’ve always been able to maintain edit between both Lightroom and Camera RAW, but switching between them could be jarring. The interface was different and the terminology of various adjustments wads always different, so it could be confusing for new users, especially if you only used camera raw occasionally.
Camera RAW Intro Screen when First Run
Options when you first launch Camera RAW 12.3
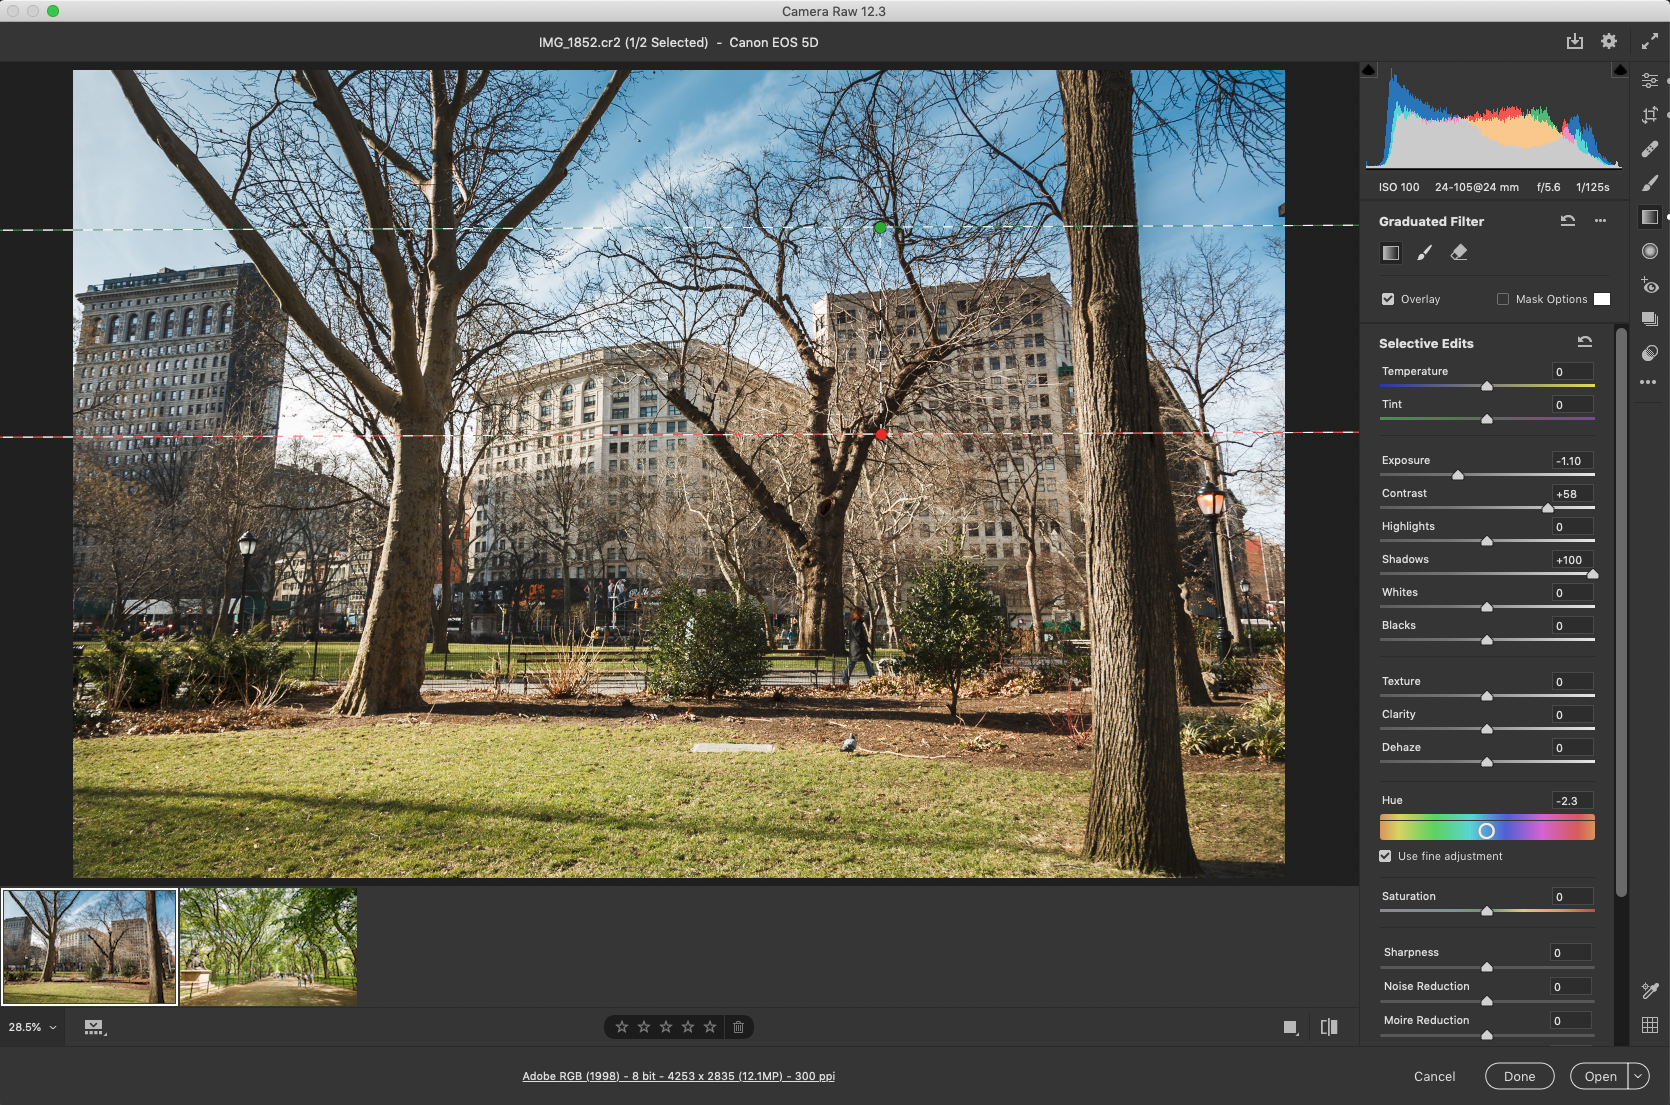
New Camera RAW Interface
With this new update in Photoshop 21.2, Camera RAW 12.3 gets a much needed makeover. It now looks much more like Lightroom. The panel layout is very similar to Lightroom (cloud) desktop, and the headings are now the same as Lightroom desktop, but the actual slider design is more like Lightroom Classic. So, it’s kind of a hybrid of both. You can now open multiple panels together, without having to switch tabs like the old version. The filmstrip is also now along the bottom, just like it is in Lightroom (although you can switch it back to the side if you want). The Curve tool also gets a redesign to match the Lightroom version.
The other tools that were previously across the top left are now down the right hand side. This makes it more natural as everything is grouped together as opposed to all over the interface, and seems like a more natural fit. The icons fore these (healing tools, gradient and brush etc) are also laid out very similarly to Lightroom (cloud) Desktop.
Some of the keyboard shortcuts have also been changed, and the biggest improvement for me personally is that finally, clicking the viewer in Camera Raw toggles between viewing zoomed out and viewing 1:1, or 100% like Lightroom (Unlike the old version where it kept zooming in) You can also change the pan tool to behave more like Lightroom.
The performance seems to have improved a significant amount too, and according to the documentation, it now fully supports High DPI or Retina displays (I hadn’t noticed an issue before, but I don’t use it that much on my laptop which is my only retina equipped computer at the moment)
Conclusion
If you spend most of your photo editing time in Camera RAW then this new interface might be jarring for you, but I suspect most will find it better after some time adjusting. However, for those who spend the bulk of their time in Lightroom and only use Camera RAW occasionally then the process of jumping back and forward between them has now just gotten a lot less jarring. This has been a long time coming, and I for one am much happier with the result.
Help Support the Blog
This blog (and my YouTube Channel) are my full time jobs, and are supported entirely by sales of my eBooks, presets and by support from readers like you. If you want to help keep this going then you can do so by…
Buy me a coffee / Tip Jar**. If you want to support the blog, you can buy me a coffee via PayPal with a one off donation to my PayPal tip jar.
You can support me on Patreon. If you like what I do here and find the information useful, then you can help by subscribing to me on Patreon
You can also show support by buying something from my from my Digital Download Store where I have Lightroom Presets, and e-books available for download. If you're a Fuji X-Trans shooter and Lightroom user, check out my guide to post processing X-Trans files in Lightroom. I also have a guides for processing X-Trans files in Capture One and Iridient Developer. For Sony Alpha shooters I have a new guide with tips on how to get the best from processing your A6000 Images in Lightroom.
If you like this post then you can see more of my work on Instagram, Twitter and Facebook. I also have a YouTube channel that you might like. You should also check out my other Photography Project: The Streets of Dublin. If you want to get regular updates, and notices of occasional special offers, and discounts from my store, then please sign up for the Newsletter.