

A Closer Look at Affinity Photo 1.5 for Fuji Raw Processing
While I’ve talked about Affinity photo before at various times, and I’ve briefly covered the application for processing Fuji Raw files, I realised that I haven’t really looked at it in depth. In fact, a reader recently emailed me about it, and it was only then that I realised that I hadn’t explored the application’s RAW processing in detail.
Let me start by discussing what I see as the big limitation to using Affinity Photo at the moment. Well, for me anyway. I do use Affinity photo occasionally, but mostly as an alternative to Photoshop. I don’t really use it for RAW processing that much. The reason for this is that it’s only really suitable for working on one image at a time. Even with Photoshop and Bridge you can open multiple images in camera raw, and process a group at a time. With Affinity you can open multiple images as tabs in the develop persona, but they are all separate individual documents. So even though you can have several open at the same time, there’s no easy way to do things like copy the develop parameters from one to another and so on.
This style of working may well be fine depending on your workflow, but I’ve gotten used to the way of processing images that you would do with the likes of Lightroom or Aperture before that. This makes it hard for me to go back to using applications like Affinity for my regular raw processing. If you have a large group of images that you need to process, the way of working on them is just too slow for my tastes.
Ok, now that I’ve gotten that out of the way, lets take a closer look at the actual quality and features. When you open a RAW file in Affinity Photo it opens the develop persona. This is effectively Affinity’s version of Camera RAW. It offers many of the same tools, although some of them function slightly differently. However, to all intents and purposes, you can pretty much do what you can in Camera RAW. There is even gradient and brush based selective editing, and a spot tool for removing dust spots. Once you’re finished, you hit the develop button to process the RAW file into a normal image layer in Affinity, where you can do further editing.
In terms of X-Trans processing, I’ve spent the last little while opening a wide range of types of images, and overall, It’s hard to find fault with it. For the most part the quality is very high, delivering a clean image with few if any artifacts. It doesn’t suffer from the smearing and edge detail issues that Lightroom and camera raw do. Fine detail is rendered perfectly normally, and there is no evidence of false detail. I have found that chromatic aberration is not as well controlled as it is in other software though. With the function turned on, it does remove some fringing, but not always all of it. There is a defringe tool in the develop persona too, and that can help clear up any extra fringing that you might encounter, although there is a little manual work involved. Obviously the extent of this depends on the lens. Distortion correction seems to work properly now. I had an issue with it in earlier versions of the software, although that may have been a bug in my setup as others reported that it worked fine at the time. Either way it seems to be working fine for me now..
Fuji X-Pro 2 18-55mm f/2.8-4 ISO 200
The sharpening controls in the develop persona are a bit odd. It’s not actually called sharpening, but “detail refinement”. I find that you need only a small amount of each, as too much can start to look false pretty quickly. Having said that, because Affinity photo is a pixel editor like Photoshop, you can use its other tools outside of the develop persona to sharpen your images, and so it may be worthwhile not applying any detail refinement, and using the normal sharpening tools.
If I was to be picky, there are a few things I don’t like about the develop persona. First of all, there is no grain function. There is an option to add noise, but it’s just the old-fashioned Gaussian noise algorithm that you would recognise from Photoshop of ten years ago. I hope at some point in the future they consider adding a proper grain function. Secondly, and this is being really picky, but I don’t like the way clarity works. I just don’t like the look of it. If I was to be geeky and technical about it, it looks to me like it’s using some kind variation of large radius unsharp mask to generate its effect. Either way, it’s harsh and unnatural looking if you turn it up any significant amount at all, and you need to keep the values pretty low. For Fuji shooters, there are no film simulation profiles either, which may be a deal-breaker for some users, but the default conversion is nice enough.
The develop persona has a few tricks up its sleeve too, that aren’t immediately obvious. If you bring up the oddly named assistant (which is more like a settings window that what you would think and an assistant would be) you can change a few options as to how the RAW converter works. You can select which engine to use. It will default to Serif’s own engine, but you can also select Apple’s Core Image Raw on the Mac. I’m not sure what the options are here on a PC. You can also select the bit depth the output is. One of the interesting options here is 32-bit HDR. This actually works surprisingly well. the whole application seems to work perfectly fine in 32-bit mode, and you get a greater degree of flexibility with your edits when you work in this mode, in that destructive edits usually hold up a lot more to repeated editing. It can sometimes look a bit weird though, with blacks looking a little raised or coloured abnormally, so you may find that working in 16-bit works a bit more normally.
Fuji X-Pro 2 18-55mm Lens, ISO 100
Another useful feature for the nerdy is the ability to tun off the tone curve and set your own. By default, raw converters apply a tone curve to the raw file when converting it. this makes it look like you would expect, with proper colour and contrast. You can actually turn this off in Affinity, and then use the curves control in the develop persona to create your own tone curve. This is kind of a high-end specialist thing to do, but it's handy that you can do this. You can do this in Apple’s discontinued Aperture, and there are a few other applications that can do this in too, although it’s never been an option in Camera RAW or Lightroom. You can actually do some useful things with this, and I actually covered the similar function in Aperture in detail in my Aperture book, but it’s a fairly advanced topic, so I won’t bore you about that here. I may do a video on it sometime if anyone is interested (let me know in the comments below).
There is one other limitation that I wish they worked address too. When you click on the develop button, and it creates a standard layer, there’s no way to go back. It’s a destructive edit at this point. There’s no equivalent of smart layers as there is in Photoshop, so there s no way to keep the develop settings non-destructive, at least now that I know of. If it had this function, it would be a big deal for a lot of users, I’m sure. It’s one of the other reasons I don’t use it too much for raw conversion.
It’s worth mentioning that there are also functions to merge images into panoramas and HDR files. Both work reasonably well, although the interface is a little clunky. You can’t seem to drag images onto the undo for example, and instead have to go through the file selection dialog box. One of the interesting things that you can do though, is if you develop an image into 32bit HDR you can then use the controls in the Tone Mapping persona to creatively edit your image.
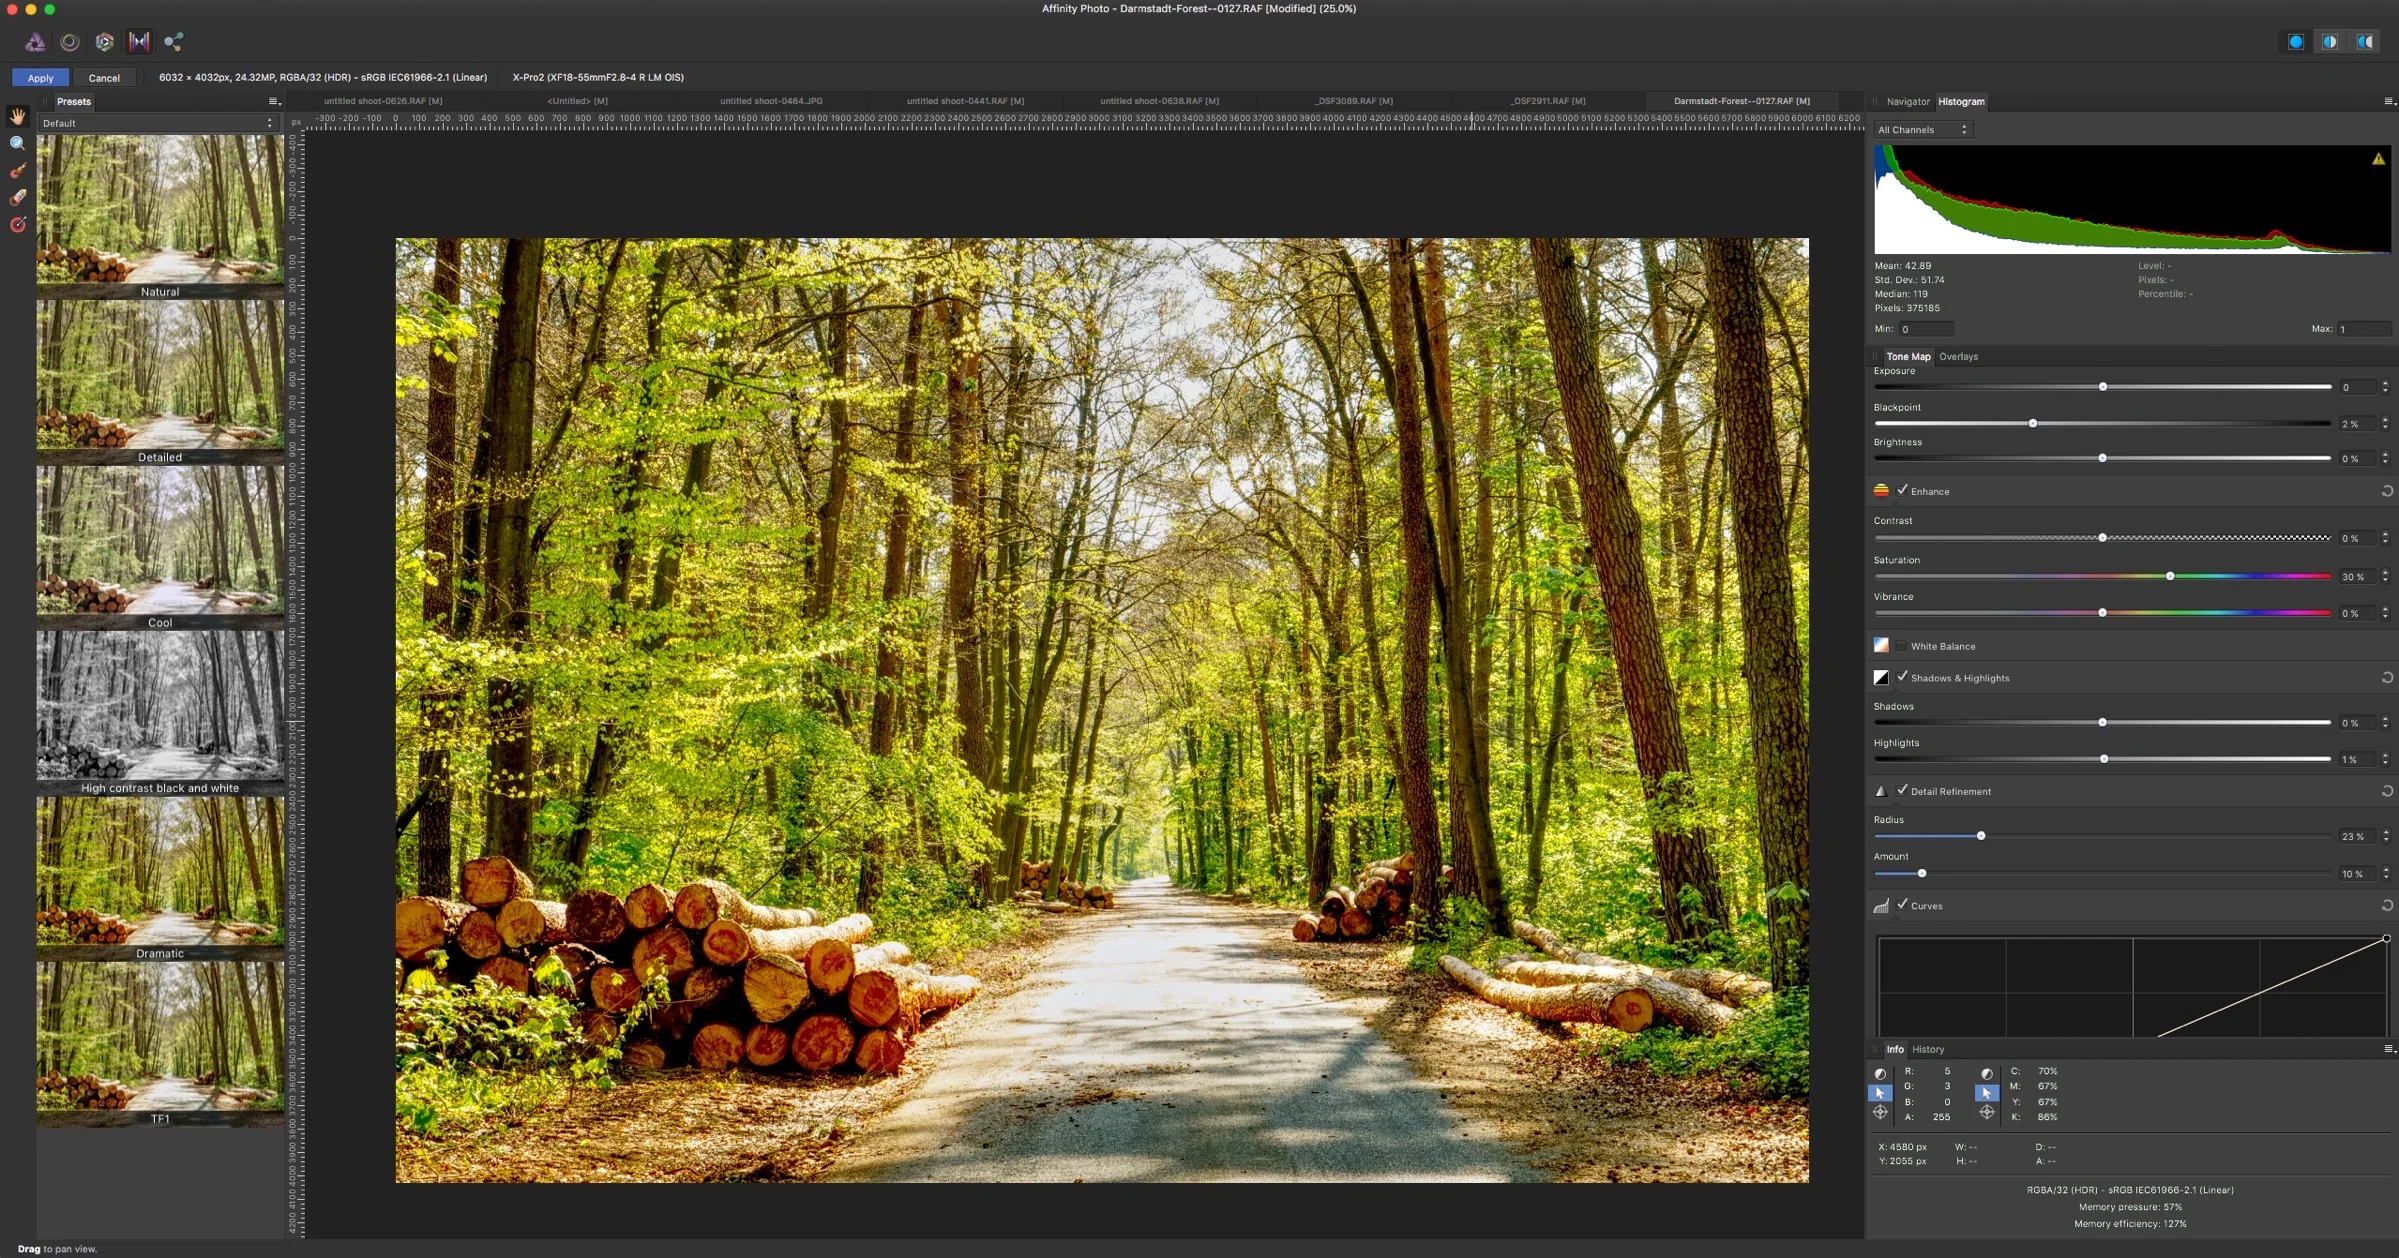
Affinity Photo 1.5 Tone Mapping Persona
Final Image Converted from a Single RAF file and Edited using the Tone Mapping Persona
There is one other issue that I came across when using it too, and that is that it’s kind of a RAW hog. With 5 images open in the software, it was running at over 15gb of memory with another 8 of compressed memory on my mac. I know it’s doing a lot, but this is quite heavy. It doesn’t seem to cache as well as other applications. Keeping images open in the develop persona seems to be a contributor, as once you click develop the memory usage drops considerably.
There is however an interesting twist in the tale to all this. The company had previously announced that they were considering an asset management companion application. Recently, they’ve reiterated that it’s in development. Some people are saying that this will be affinity’s version of Lightroom. I’m not sure about that. I suspect it will be more like Adobe bridge, which would be fine. I do hope though they impenitent the develop persona as a model of this, and even if the application is more bridge than Lightroom, I hope they make RAW developing part of it (I’m sure they will). That could well be a big shakeup in the industry if its properly implemented. If this was to work in a similar way to either Bridge or Lightroom, and address some of the workflow issues that I talked about, I would certainly consider using the software a lot more for RAW conversions. For now though, it does a good job, and the quality is high, but is limited by workflow constraints, at elastin my opinion and for my way of working. If that doesn’t bother you, then it’s definitely a worthy contender for processing Fuji files.
Help Support the Blog
I’m now on Patreon. If you like what I do here and find the information useful, then you can help by supporting me on Patreon. As well as helping keep this blog going with even more useful news, tips, tutorials and more, members also get special Patreon only perks. Stop by and check it out.
If you like this post then you can see more of my work on Instagram, Twitter and Facebook. I also have a YouTube channel that you might like. You should also check out my other Photography Project: The Streets of Dublin. If you want to get regular updates, and notices of occasional special offers, and discounts from my store, then please sign up for the Newsletter.
You can also show support by buying something from my from my Digital Download Store where I have Lightroom Presets, and e-books available for download. If you're a Fuji X-Trans shooter and Lightroom user, check out my guide to post processing X-Trans files in Lightroom. I also have a guides for processing X-Trans files in Capture One and Iridient Developer. For Sony Alpha shooters I have a new guide with tips on how to get the best from processing your A6000 Images in Lightroom.


