My Fuji X Series In-Camera Settings
On this blog, I've covered the settings and techniques I use for processing Fuji raw files quite a bit, but I've never really discussed the settings that I use in-camera for use with Jpeg images. While I mostly use the Raw files, I do occasionally use Jpegs straight from the camera. Over the years I've been using my X-E1, I've chopped and changed the setup that I use quite a bit, but here are the settings that I currently use.
ISO:Auto 800 / 1600
I use my X-E1 for street photography a lot, and I find the auto ISO function to be quite useful. It is generally pretty good at picking the lowest ISO and still be useable. I generally leave it on this setting, but i ill occasionally set it manually.
While you can select this from the Q menu, you need to set it up initially in the main menu. Go to Menu > ISO > Auto to bring you to the Auto Iso Control screen. Here you can set the default sensitivity, the maximum sensitivity, and the minimum shutter speed that you want to use.
Mine are set as follows:
- Default Sensitivity: 200
- Max. Sensitivity: 800
- Min. Shutter Speed: 1/100
I will occasionally set the max sensitivity to 1600 if it's a dull day or I feel that I'm not getting a high enough shutter speed, but I prefer to keep it lower to maximise image quality.
DR: Auto
I generally set this to Auto, as it helps when I'm in high contrast situations. If I'm finding that the camera is using the expanded dynamic range when I don't want it to, I will set this to manual, but I mostly just leave it set to auto.
White Balance: Daylight or Auto
I mostly leave my white balance set to Daylight. I find that the light is constantly changing here in Ireland, and I prefer to have a consistent tone, rather than having the camera constantly trying to compensate. However, there are occasions when I'll use auto, if I'm not happy with the results. Of course, If I'm shooting indoors I'll change it to the corresponding settings.
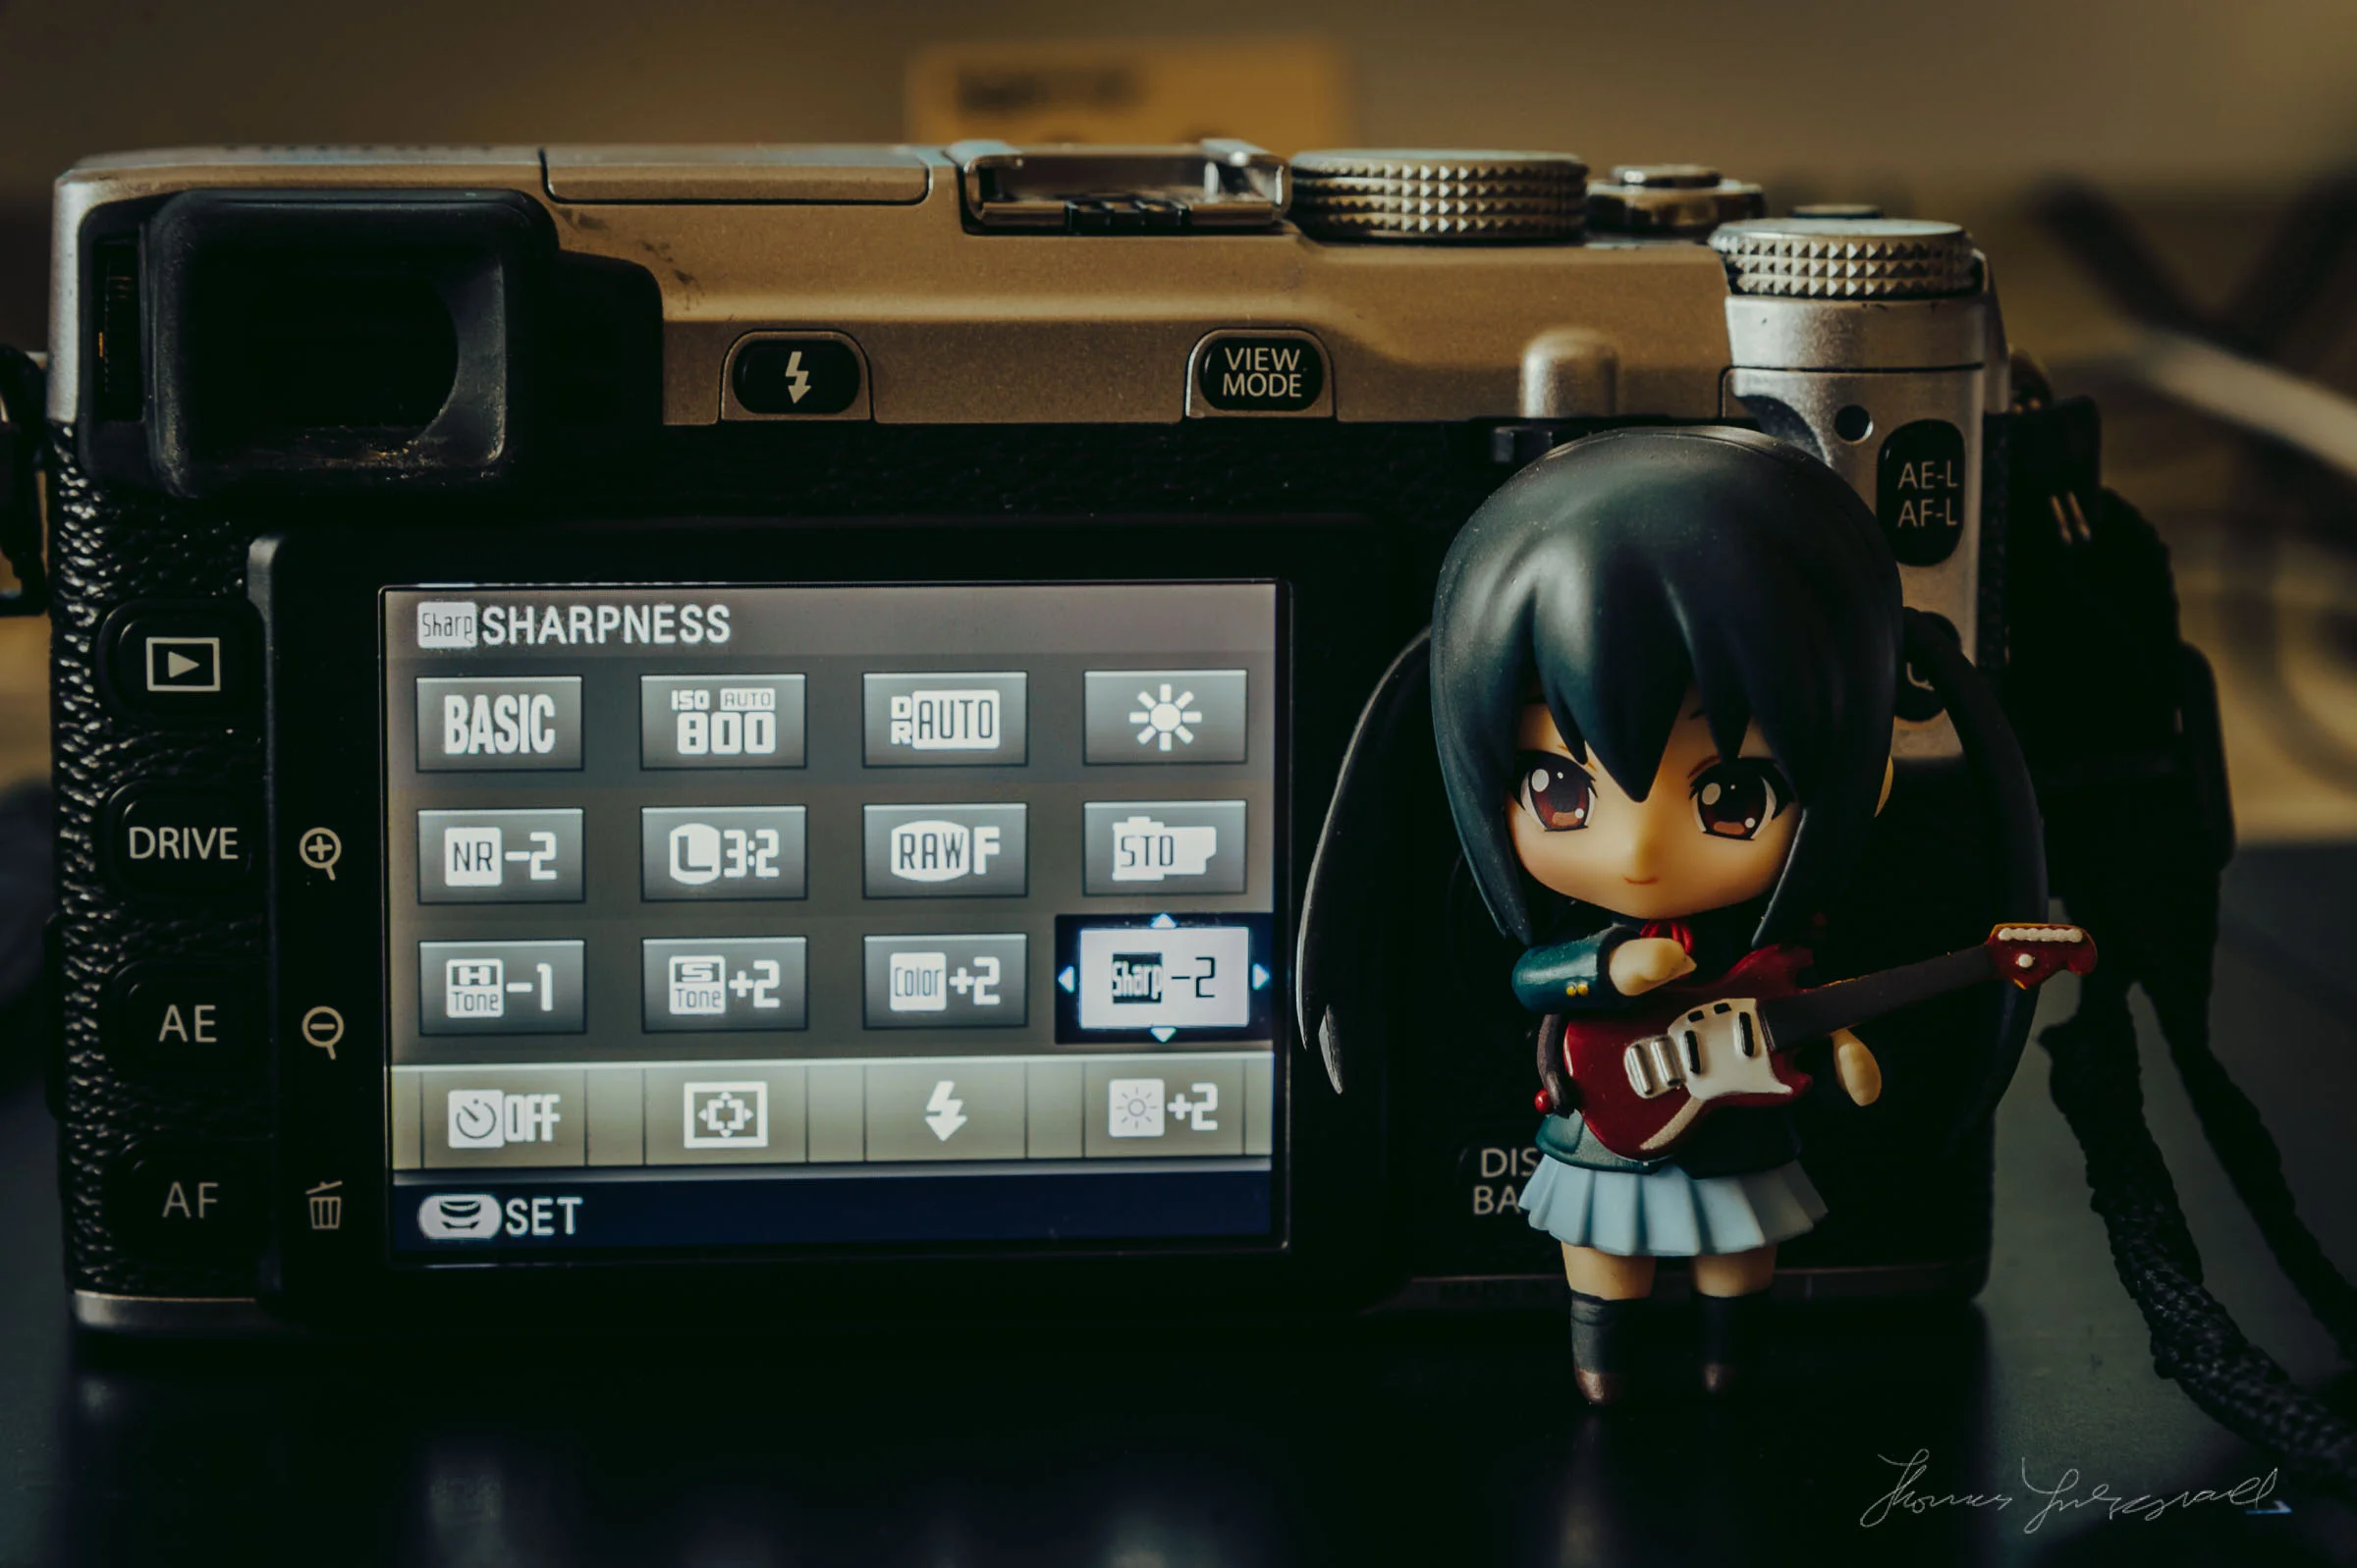
NR: -2
I keep the NR setting to -2 because I don't want the camera performing any noise reduction on the image. If you could set it lower I would (you can on the new X-Pro 2). Even on higher ISO images, i would prefer a little noise than the horrible noise reduction effect.
Image Profile: Standard (provia) or Pro-Neg Hi
I mostly shoot with either of these two picture profiles. I find Velvia a little too over-saturated for my liking, but I will occasionally use it if I feel the need.
Image Format: Raw + Jpeg Fine
I set my images to capture in RAW + Jpeg (so that I have the best of both worlds) and I keep it set at Large and Fine for the Jpeg controls
Shadow Tone
I keep the Shadow Tone settings at +1 to add some contrast to the images straight out of the camera. Sometimes this may be a bit much though so I'll turn it to zero, but I mostly leave it on plus 1.
Highlight Tone
I keep this set at -1 so that the highlights are a bit softer and have a nicer roll off.
Colour +2
I find that ProNeg and Provia can sometimes be a little dull straight out of the camera, but as I said earlier, Velvia is a little too saturated for my tastes. The compromise for me is to keep it on either Provia or ProNeg and keep the saturation pushed up to +2. If I do use velvia, I'll set the colour to -1
Sharpness -2
This one may be a little controversial, but anyway, here's my reasoning for keeping it at -2. I know that some people like to keep their settings at + 1 for sharpness, but in my opinion, this results in images that are over-sharpened. I find that anything over 0 results in a very "digital" looking image, especially at higher ISO settings. I find, that in my experience, keeping the sharpness settings at -2 does not dramatically soften the image, especially when shooting with prime lenses, and instead, gives a more natural, and more filmic look to your images.
As I said, I know there are some people out there that will disagree with me on this sharpening setting, but it's up to you. These are the settings that I use and I stand by them, but they are just my personal preferences. Still, If you have the time, and you normally shoot with the sharpness turned up, try turning it right down and see if you like the difference. If you need to you can always add a little sharpness in post production any way. Most software will allow you to ad sharpness with relatively little effort, and in general software based sharpening is usually better than in-camera algorithms.
So that's pretty much it. Obviously these settings are based on the camera that I'm using, in this case the X-E1. Some of the newer Fuji cameras will offer different options, such as classic chrome, or in the case of the X-Pro 2, lots of different options.
I hope this has been of some use to you either way. if you haven't seen them before, check out my Post processing guides for Fuji X-Trans cameras. I have guides for Lightroom and Capture One and I'm currently working on a third one for Iridient Developer.