Save Library Filter Searches in Lightroom
Note - This post has been republished from the Lightroom Diary
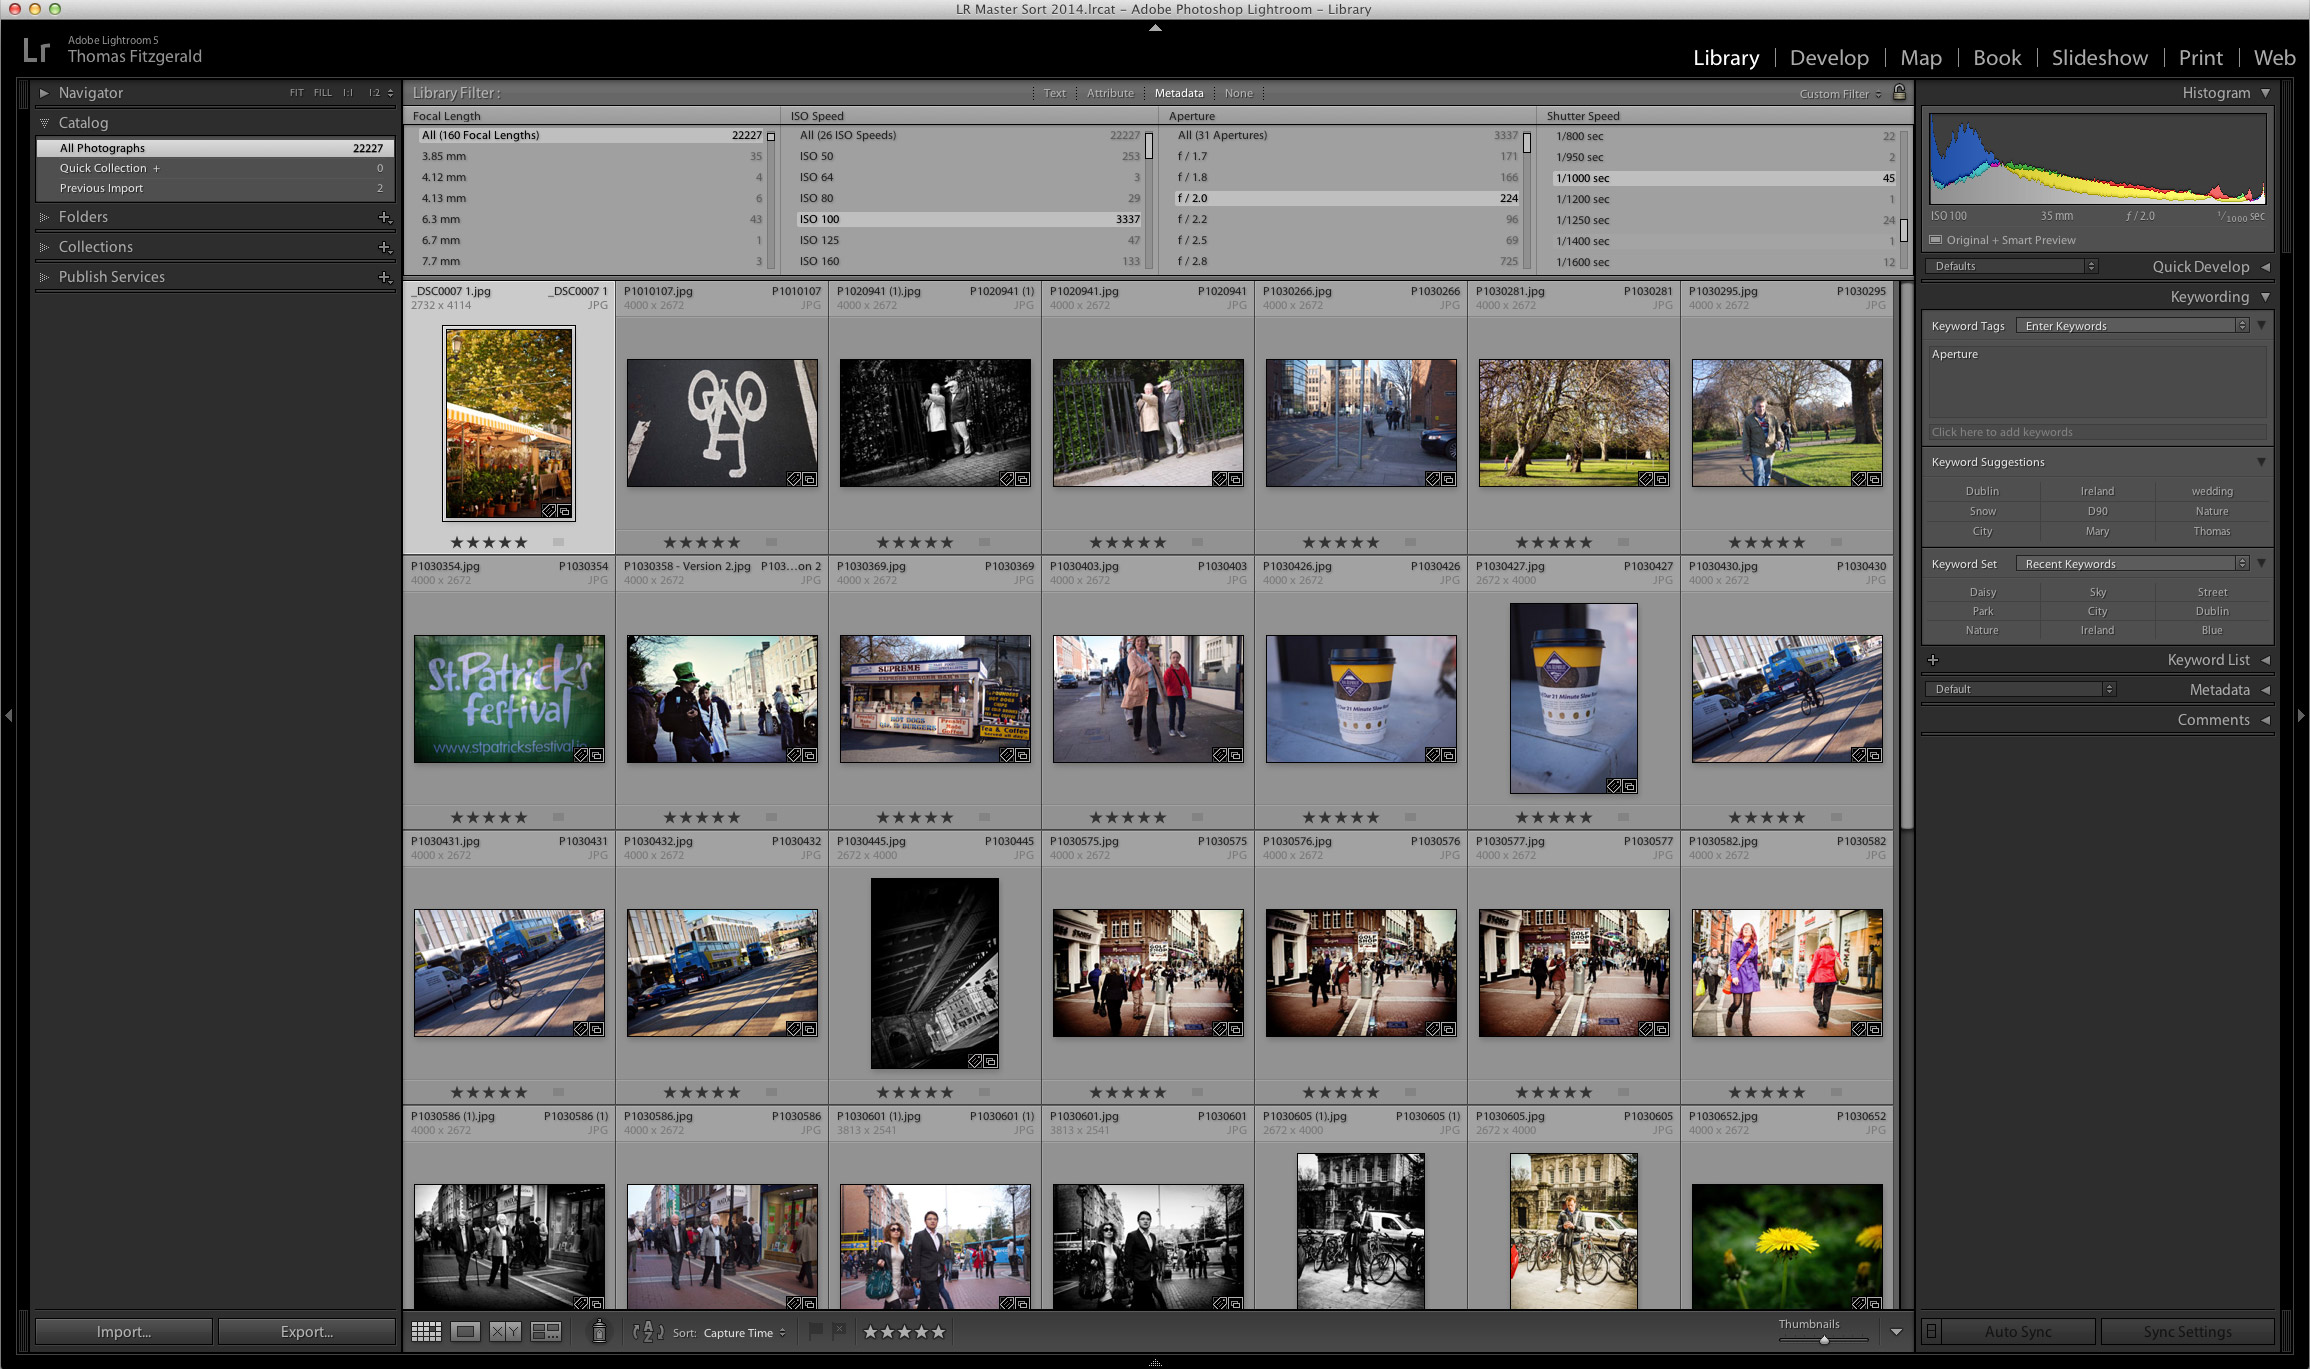
When you’re in grid view in the Library module inside of Lightroom you can filter what is shown in the view by a number of criteria such as star rating and various types of metadata by using the strip along the top of the grid view panel. This effectively allows you to search for certain kinds of images. You can actually create reasonably complex search criteria using the filter options, and what you may be unaware of is that you can save these filter settings for later use. To give you a better idea of what I’m talking about let’s use an example.
I have a folder full of images of different kinds and different ratings. This will work on any kind of source, whether it’s a folder or a collection, or even a group of folders or collections.
- So start by selecting a source from either the Folders panel or the Collections panel. You can also select any of the entries from the Catalog panel either.
- Now, if you’re not already in grid view, switch to grid view by pressing “G” on the keyboard.
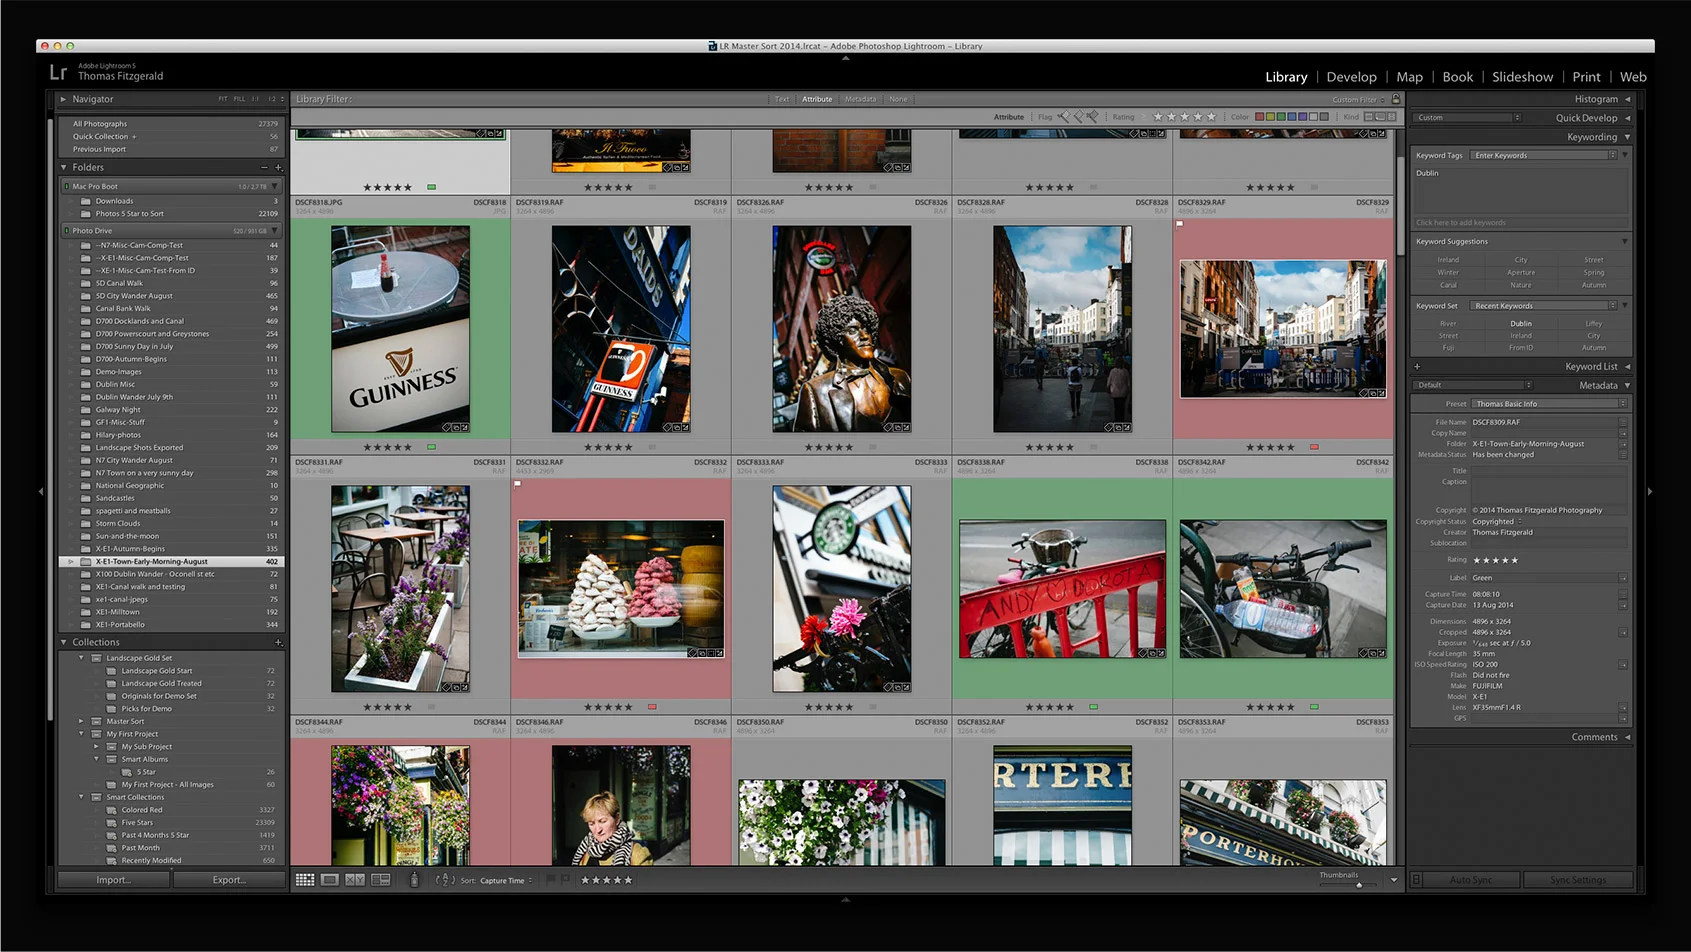
- Let’s start by narrowing our view to just 5 Star images (obviously this will only work for you if you have some 5 star images in the selected source). Click on the “Attribute” text in the Library Filter strip across the top of the Grid view. This will bring up the options for flag ratings, star ratings, colour labels and image kind. The image kind option lets you select Master Images, Virtual Copies and Videos. In this case, lets’ just select the 5 star images by clicking on the last star so that all 5 stars are highlighted.
- Now, lets say we want to narrow our filter down even more. Say, for example we have some different file types in the folder and we want to only show DNG files with a 5 star rating. Well, we’ve already taken care of the 5 star part, so now we need to select DNG as the file type.
- Click on the “metadata” text to bring up the metadata options. Notice that the Attribute tab will still be at the top.
- By default, the Metadata options won’t show file type as one of the options, but we can change that easily. If you hover over one of the column headers you’ll see little up and down arrows appear indicating that the column header is a popup menu. Click on this and you’ll get a list of available metadata to choose from.
 Select file type and the available file types will appear in the column. What’s shown here will depend on what you’re searching. For example if you have Tiff files, tiff will show up along with whatever raw formats you might have. In this example I’m going to select DNG.
 - So now our filter is showing us all 5 Star DNG images in the grid view (based on whatever source we have selected). This might be something I want to search for again,so rather than having to go through the steps each time I can save it as a custom filter.
- In the top of the filter section of the grid view, you’ll see a little popup menu called “Custom Filter”.
 Click on this to bring up the menu. Go to “Save Current Settings as New Preset…” and give it a name.
 In my case I called it 5 Star DNG


Thats how you create custom Library filter presets. The next time I need to search for 5Star DNG's within a particular folder, collection or the whole catalogue, I can quickly select it from the set of saved Library Filters from the pop-up menu at the top of the Library Filter bar (where you found the save command). This was just one example. You can combine lots of different metadata to make filters for various types of searches. Here’s a few more examples of search filters you could make:
- Show all images taken with a particular camera that are flagged
- Show all images taken with a particular camera and particular lens
- Show all images which have 5 stars and a red label
- Show all images that use a certain Develop Preset
Here are a few more tips for using the Library Filter
- You’re not limited to just 5 columns in the metadata filter panel either. You can add columns by hovering over the title bar of the last column, and a little menu icon will appear on the right hand side of the title which will give you options to add or remove a column.
- You can search by any searchable text by clicking on the Text option in the Library Filter bar across the top of the panel.
- To turn the filter off again, click on the “None” text in the filter bar.
- Library filters differ from Smart Collections in that they only search across the selected source, where as smart Collections will search the whole library (unless you add an option to limit it).
Please Help Support This Site
I am a fine art Photographer and do not shoot commercial projects. I do my best to keep this site regularly updated with lots of tips, reviews, news and photography advice, all for free. If you like what you read here and want to help support the site, then please consider buying a Print, checking out my Lightroom Presets