A Capture One (Express) to Lightroom Technique For Fuji Shooters (How to Use Capture One Express like X-Transformer - sort of)
I’ve often gotten questions from readers as to whether there is any way to use Capture One Express in a similar fashion to Iridient X-Transformer, in order to produce a file that you can then import into Lightroom for further editing. While there is no direct way to do this in the exact same way it is with Iridient X-Transformer, getting these questions did get the cogs in my brain working! I wondered if there was a way one could use Capture One’s flat profile to achieve something similar. So, after spending some time experimenting, I’ve come up with a possible solution. Read on to find out more…
Important Disclaimer
Before I get into the instructions, a couple of quick disclaimers! First of all, I don’t recommend this as a workflow. There’s a whole range of reasons as to why this is a bad idea. I’m only really showing this as an experiment, but if you want to try it go ahead. Using this method you won’t be able to use the Film Simulation modes, and the file sizes will be relatively large. Finally I know that this isn’t perfect. I’ve matched the results visually by eye, and this is only my first iteration of this theory, so there is absolutely room for improvement. If you’re ok with all that and still want to try this, then read on !
Linear Profile in Capture One
When you process a RAW file normally, part of the decoding process is applying a tone curve to the outputted image data. Because it is captured in a linear fashion, in order to look like a proper “image” that you are familiar with a “tone curve” is applied. This adds contrast and brightness in a specific way. Usually this is applied with colour corrections to create the look you’re familiar with. For Fuji shooters, this means the Film simulation profiles, or for other cameras, Standard etc. The tone curve is part of this. Without the tone curve the image is very flat, but the advantage of this is that while flat it retains most of the dynamic range in the image, and with no edits applied to it, it’s kind of a “base” level from which to edit with.
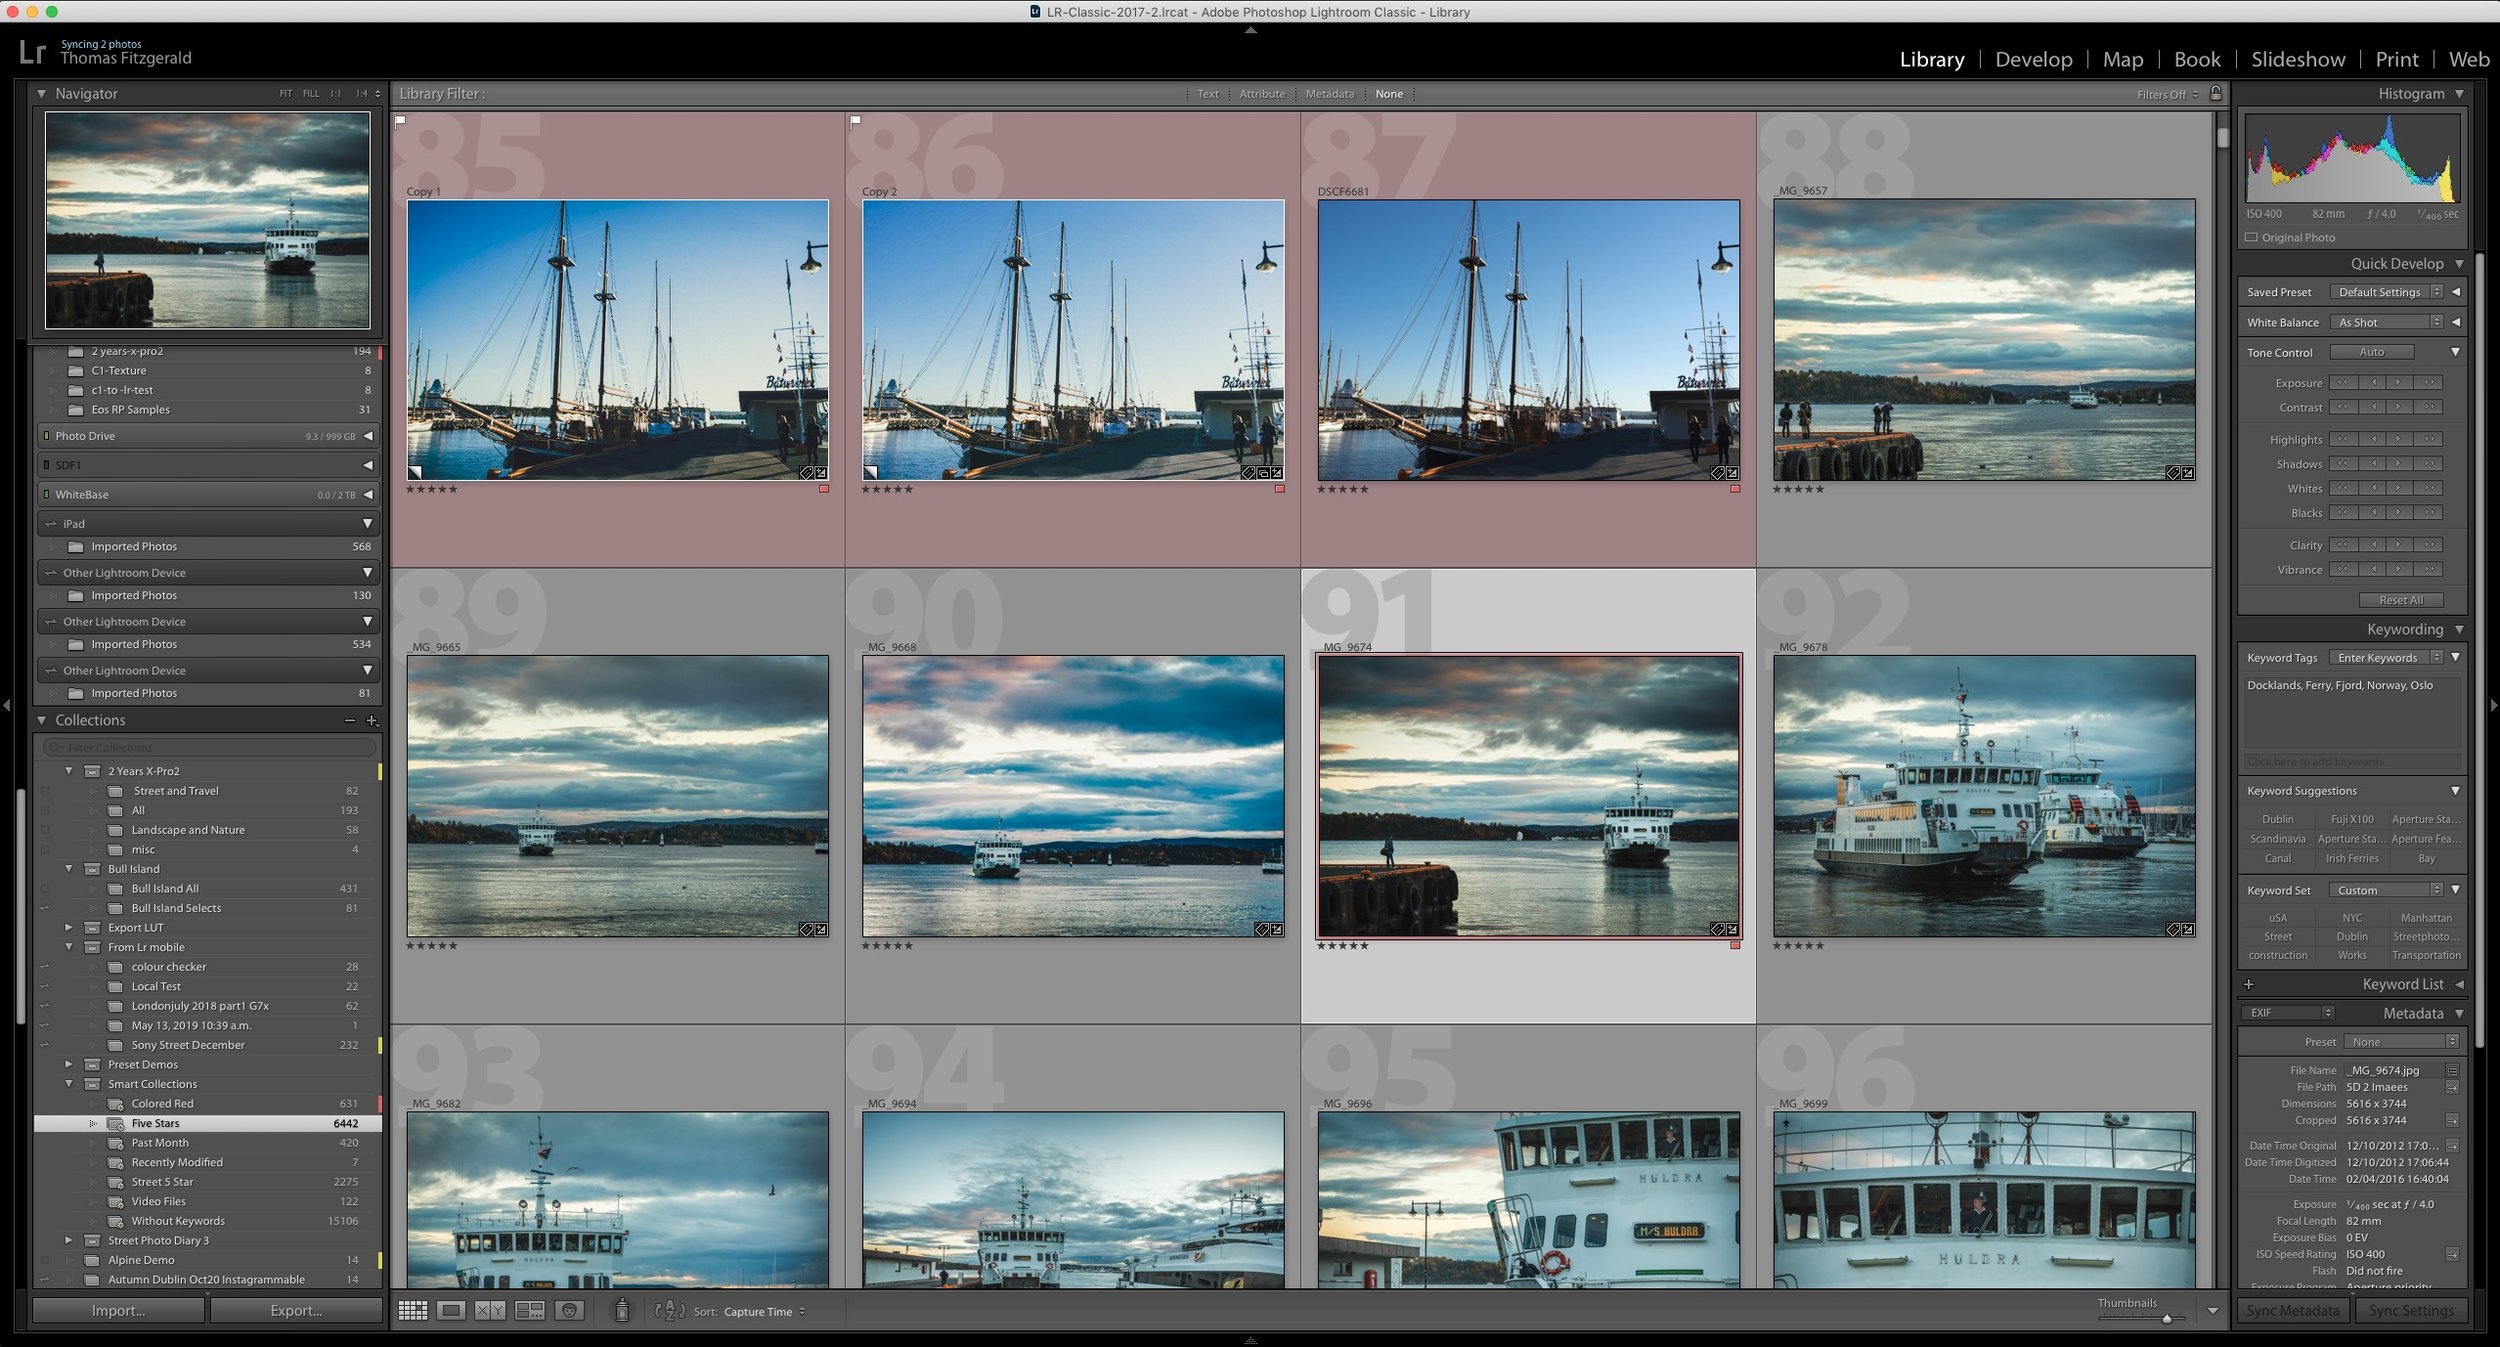
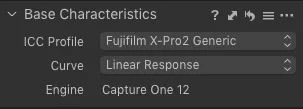
This is actually the Pro version of Capture One, but this technique should work in either version
What we’re trying to achieve here is to have a set of settings to apply in Capture One that can be applied to every image - in order to batch process with minimal input from the user. One can then import into Lightroom, with another set of parameters that give you the most editable file while still taking advantage of Capture One’s superior demosaicing.
One of the advantages of Capture One is that it lets you set a “Linear” profile, which is basically the image without a tone curve applied. Using this we can export the image and re-apply your own tone curve in Lightroom. This kind of works like how a “log” profile works for video, giving yo more dynamic range when editing. It’s not exactly the same as Log though (before you start writing angry comments). Also, sometimes you will still get information hat is clipped when just using the Linear profile, because the dynamic range of the RAW file is still greater than what can be achieved in a normal RGB file. To get around this we can use the highlight recovery in Capture One in conjunction with a linear profile.
So here are the settings I use in Capture One:
- Base Characteristics > Curve: Linear Response
- Exposure > High Dynamic Range > Highlight: 100
You’ll also want to do any tweaks to sharpening and noise reduction here first too. I have recommendations for this in my Capture One Fuji guide
I then exported the image as a 16bit Tiff with Adobe RGB as the colour profile. It is really important that you use 16bit. If you’re using the full version of Capture One, you can use PSD if you prefer, but if you don’t use 16bit it may degrade the image. Don’t bother trying to use DNG as it won’t work.
Lightroom (and Photoshop)
Once in Lightroom, you can then apply a tone curve to correct the linear profile. I created one by matching by eye the results I was getting in Capture One. With this applied, you should still have a degree more of editing potential than you would by just exporting it directly, including some shadow recovery and a little highlight recovery. Here’s the curve I used:
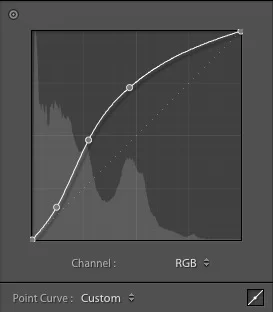
One of the reasons that you might want to do this is that you have presets in Lightroom that you might want to use, and in many cases presets use a caves adjustment as part of the way that they work. In that case this won’t work, as it will overwrite the necessary correction curve. However, there is a way around this. We can save this curve as a “profile” and apply it as a profile instead. In fact, I’ve done this for you and you can download it from the link at the end of the article.
So now, in Lightroom all you have to do is import the linear Tiff and set the profile to use the C1-Linear profile that I’ve supplied, and it should work. (You need a recent version of Lightroom to use this - if you’re using version 6 this won’t work). This should work in Photoshop too via Camera Raw.
Note that some Lightroom presets use a profile baked in, and so you may need to reset to this profile after you’ve applied the preset.
Is there a huge benefit to working this way? I’m not really sure to be honest. You’re probably better off just getting it mostly right in Capture One and then use Lightroom to apply any finding touches, but I think tis’s till worth experimenting with. As I said at the start, I’m only presenting this as an idea. It’s not ideal, and I don’t recommend it as an ideal workflow. You’d probably be better off using “Enhance Details” or X-Transformer, but if you can’t use the. Former and don’t want to buy X-Transformer, the advantage of this is that Capture One Express is free. But please try it out and let me know how you get on in the comments below.

Download
The download link below contains both a develop module preset for the curve and a profile, which will do the same thing. You can use one or the other, but you don’t need to use both. To install these (if you’re using the current version of Lightroom) here’s what to do:
- Open Lightroom
- Go to the Develop Module
- At the top of the Preset panel click on the + button
- Choose Import Presets
- Select the zip file you downloaded (you don’t need to unzip this)
- Click ok
- This will install both the Preset and the Profile.
The profile will be found under “User Profiles” and is called “C1-Linear-Fuji-01” The preset will be in a folder called “Flat from C1” and the preset is named “ToneCurve1”
Please note, I have no way to create presets for older versions of Lightroom, so if you’re still using version 6 or any other pre-subscription version, you’ll have to re-create the curve yourself using the screenshot above.
Speaking of Capture One, if you want the full version and you want to support this blog:
- You can buy Capture One here - by going through my affiliate link I’ll get a small commission!
- You can buy any of my Capture One Styles through my online store!
Help Support the Blog
This blog is pretty much my day job now and I work to bring you my own take on photography, both tutorials and tips, as well as inspiration from my own art. I support this work, and my YouTube channel entirely either via sales of my eBooks and Lightroom presets, or the kind support of my readers. (I also have some affiliate ads). Running all this isn’t cheap, and so If you like what you see and you want to help keep this all going, there are a number of ways you can do so:
- If you’re buying anything on Amazon, you can help by using my affiliate link: Amazon US or Amazon UK.
- You can support me on Patreon. If you like what I do here and find the information useful, then you can help by subscribing to me on Patreon. As well as helping keep this blog going with even more useful news, tips, tutorials and more, members also get special Patreon only feed, which gives you behind the scenes content, as well as monthly downloads (for the top tier), for only €2 or €5 a month Stop by and check it out.
- Buy me a coffee / Tip Jar. If you want to support the blog but don't want to sign up for Patreon, you can buy me a coffee via PayPal with a one off donation to my PayPal tip jar.
You can see more of my photography and keep up to date by following me on social media and checking out my other websites: