A Simplified Approach to Sharpening in Fuji Files in Capture One
I’ve written a lot about sharpening Fuji files in various pieces of software, and in fact, I have a whole guide for Capture One with details and corresponding presets. However, for some, this may be still a little too complicated, so I wanted to give you just the absolute basics. This is particularly suitable for those who may be using Capture One Express but the advice works for both express and pro versions. I fact, this advice will really work with any file.
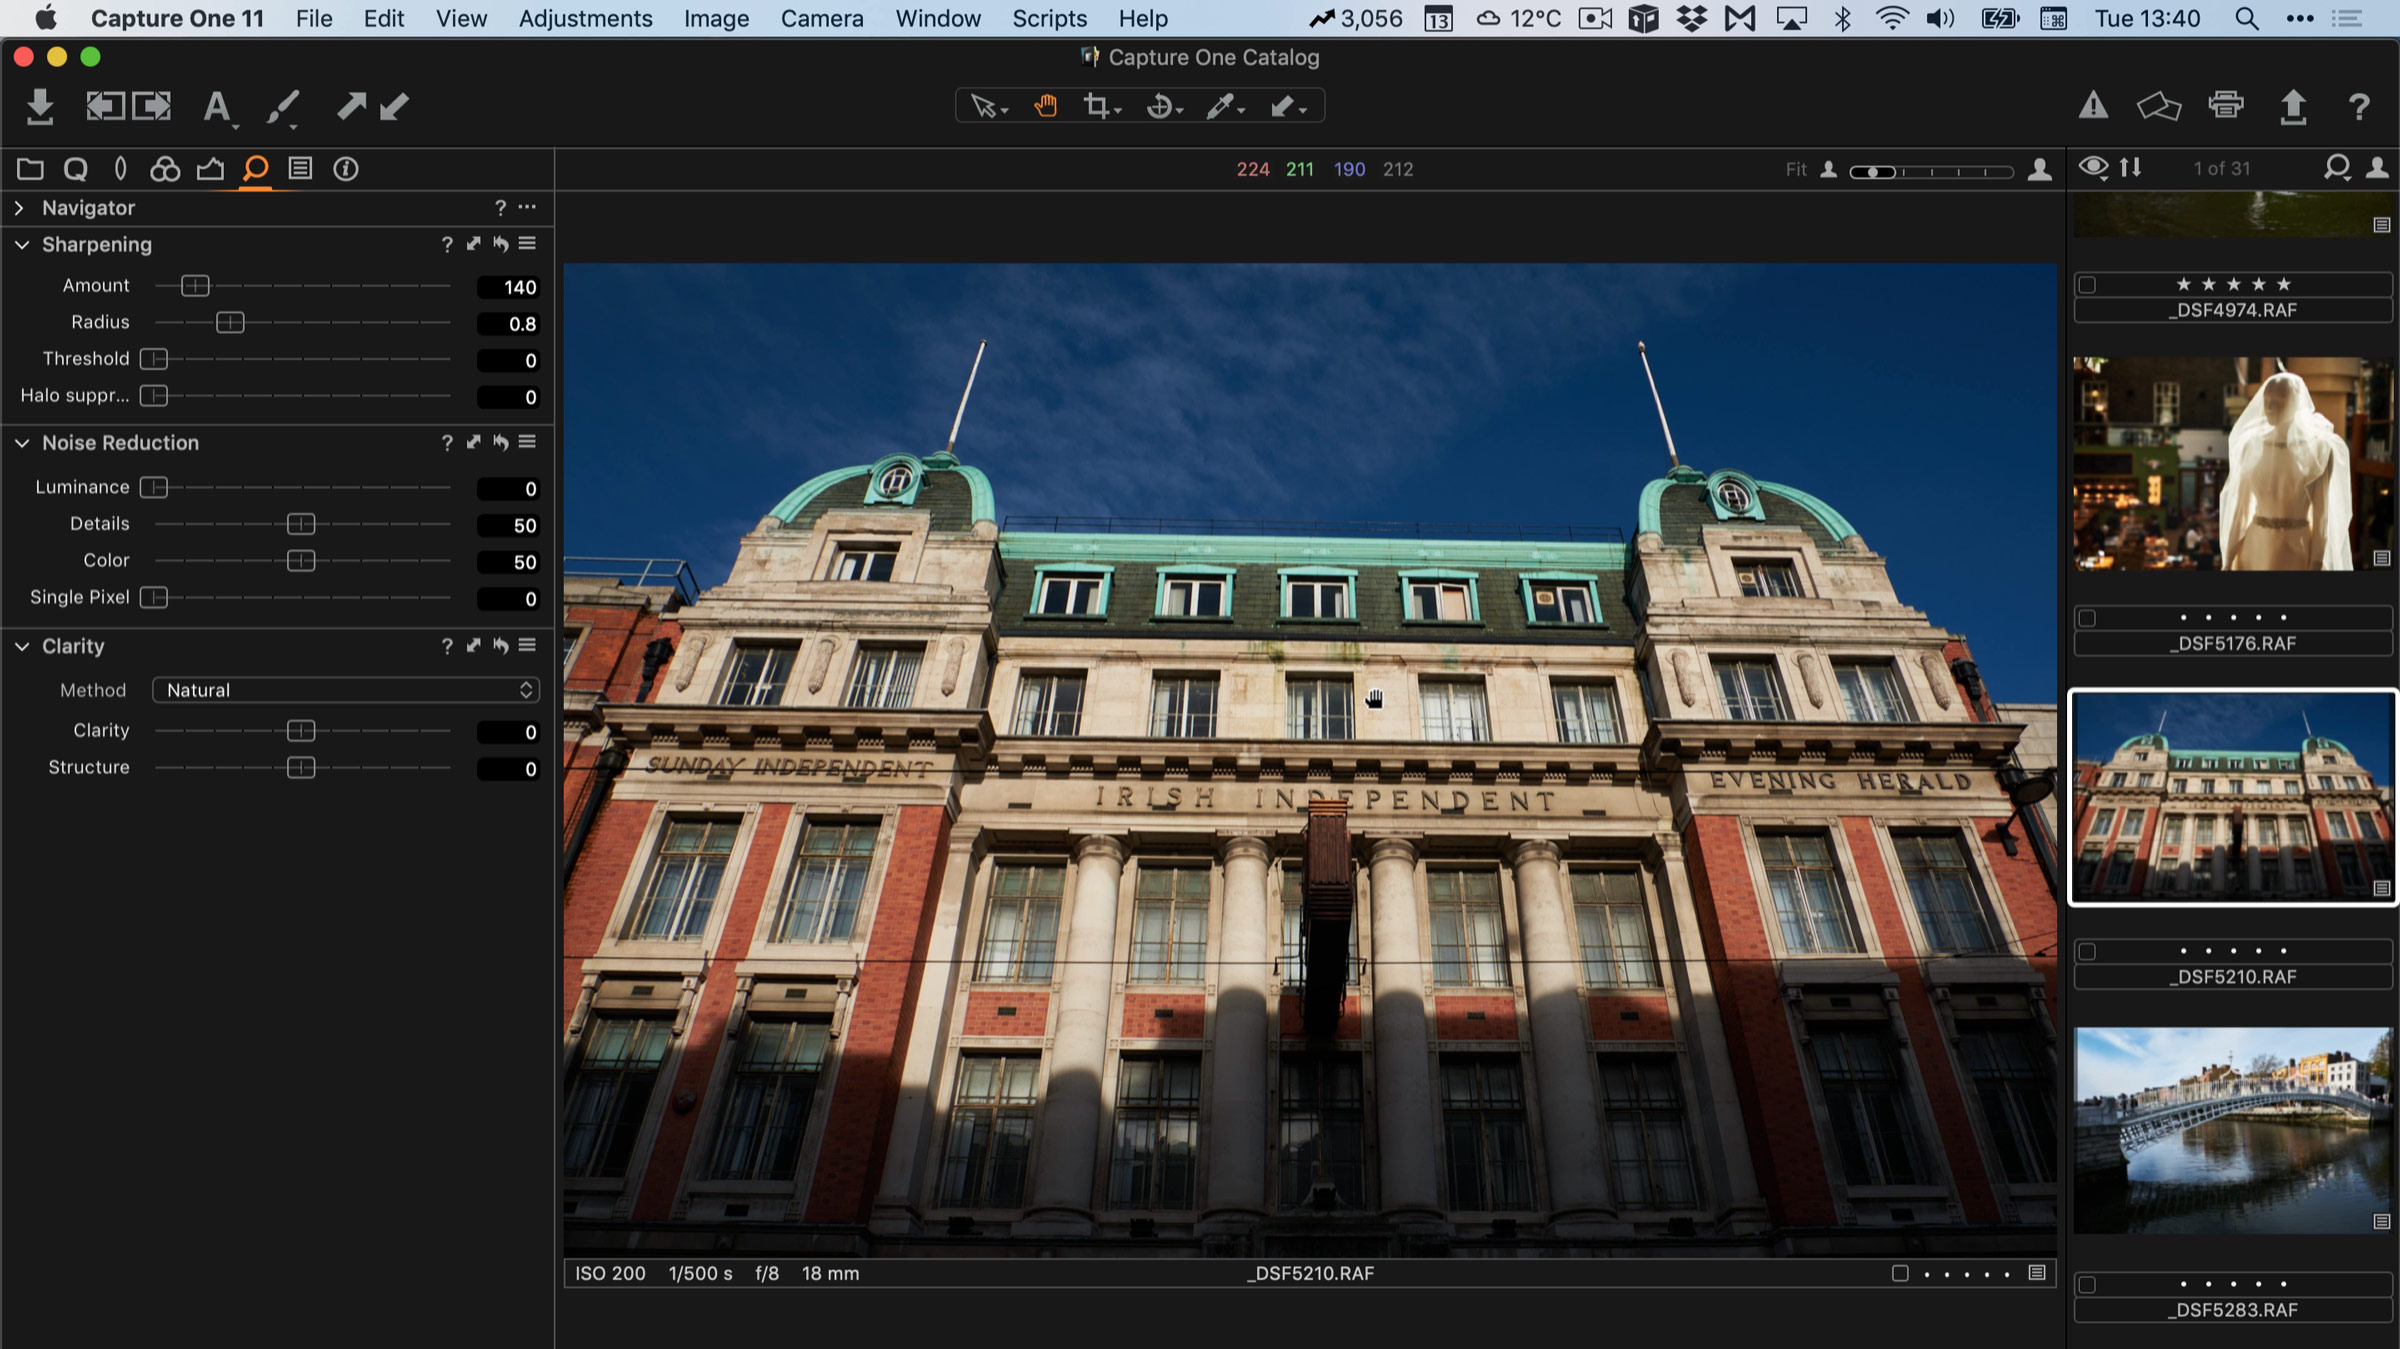
The above video walks you through the process, but for those that prefer to read what to do, here is the summary. Basically, in my opinion, the defaults are a little heavy handed with the processing and I suggest making some changes.
The first and most important thing to do is zoom to 1:1 when adjusting sharpening in Capture One. The reason for this is that Capture One doesn’t render everything fully at lower zoom levels, and it also agressively anti-aliases the image. If you’re adjusting sharpening zoomed out, you may find that you’re over-sharpening to compensate and you images will be over-processed when exporting. If you’re using the full “Pro” version of Capture One, you can use this trick to proof your images while in the software. (It’s not available in express)
There are two things that you need to focus on, and both can be found in the detail panel (the little magnifying glass). The first is in The Sharpening section. for the most part, the defaults are ok, however, in my opinion, the threshold is too high, and for low iso images (200-1600) you don’t really need this turned up at all, so I set this to zero. The difference can be subtle, but it adds a little crispness to the texture of your image. If you find it’s sharpening the background noise too much you can raise it again to the point where you feel it is better.

One of the other issues with the threshold is that it is a hard cut-off as far as I know. What I mean by this is that unlike a “falloff” there is no gradation between sharp and not sharp, as defined by the threshold. This can sometimes lead to artefacts. Again it's subtle, and if this is confusing don’t worry about it, it’s not something you really need to deal with normally. Just set it to zero for the most part, and raise it if it’s too low.
For the most part the other sliders here are fine for most normal images, and I’m not going to go into the details of what they do right now, although the amount slider should be pretty obvious!
Secondly, is the Luminance noise reduction slider in the noise reduction section. This, again, is too high for typical low to normal ISO images. For ISO 200 - 800 I suggest turning this off altogether. You may get a little grain in you out of focus areas or solid colours, but you will also have more details in areas of fine textures. You can start to raise this again if you find it’s too low and there's too much noise. For higher ISO images you can leave it at the default.

So, in a nutshell, Reduce the Threshold and the Reduce the Luminance Noise reduction, and then raise them back to suit.
So that’s basically it. I go into a bit more detail with examples in the video, so do check it out if you have the time. There is a lot more to sharpening in capture one, especially if you have the pro version, and I will be covering it in more details in a future post/video.
Help Support the Blog
I’m now on Patreon. If you like what I do here and find the information useful, then you can help by supporting me on Patreon. As well as helping keep this blog going with even more useful news, tips, tutorials and more, members also get special Patreon only perks. Stop by and check it out.
If you like this post then you can see more of my work on Instagram, Twitter and Facebook. I also have a YouTube channel that you might like. You should also check out my other Photography Project: The Streets of Dublin. If you want to get regular updates, and notices of occasional special offers, and discounts from my store, then please sign up for the Newsletter.
You can also show support by buying something from my from my Digital Download Store where I have Lightroom Presets, and e-books available for download. If you're a Fuji X-Trans shooter and Lightroom user, check out my guide to post processing X-Trans files in Lightroom. I also have a guides for processing X-Trans files in Capture One and Iridient Developer. For Sony Alpha shooters I have a new guide with tips on how to get the best from processing your A6000 Images in Lightroom.