

My Capture One Settings for Sony Files
I’ve talked a lot about using Capture One Pro for processing Fuji Files here on this blog, but I also use it when working with other cameras too. In particular, I find that it does a really nice job when working with files from Sony cameras. In the past I’ve used it with both a Sony A7II (Which I had borrowed), and my own Sony A6000.
To get the best results from Sony Raw files, I recommend a few changes to the default settings. In particular, the sharpening and noise reduction options. In my opinion, the defaults are not optimal for getting the best results. The noise reduction is set too high by default, and there are a few tweaks that you can make to the sharpening settings too. I also recommend changing the default tone curve to the higher contrast option, but that’s a personal preference.
Here are the settings that I use as a base level for my A6000. These are where I start, and you can then tweak these depending on the image, the iso of the shot and so on. These are for Capture One Pro 10, and the locations of various settings are based on the new default workspace. If you can’t find a specific tool, you can add it by right clicking on the interface and choosing: Add Tool > Specific Tool.
Colour Tab
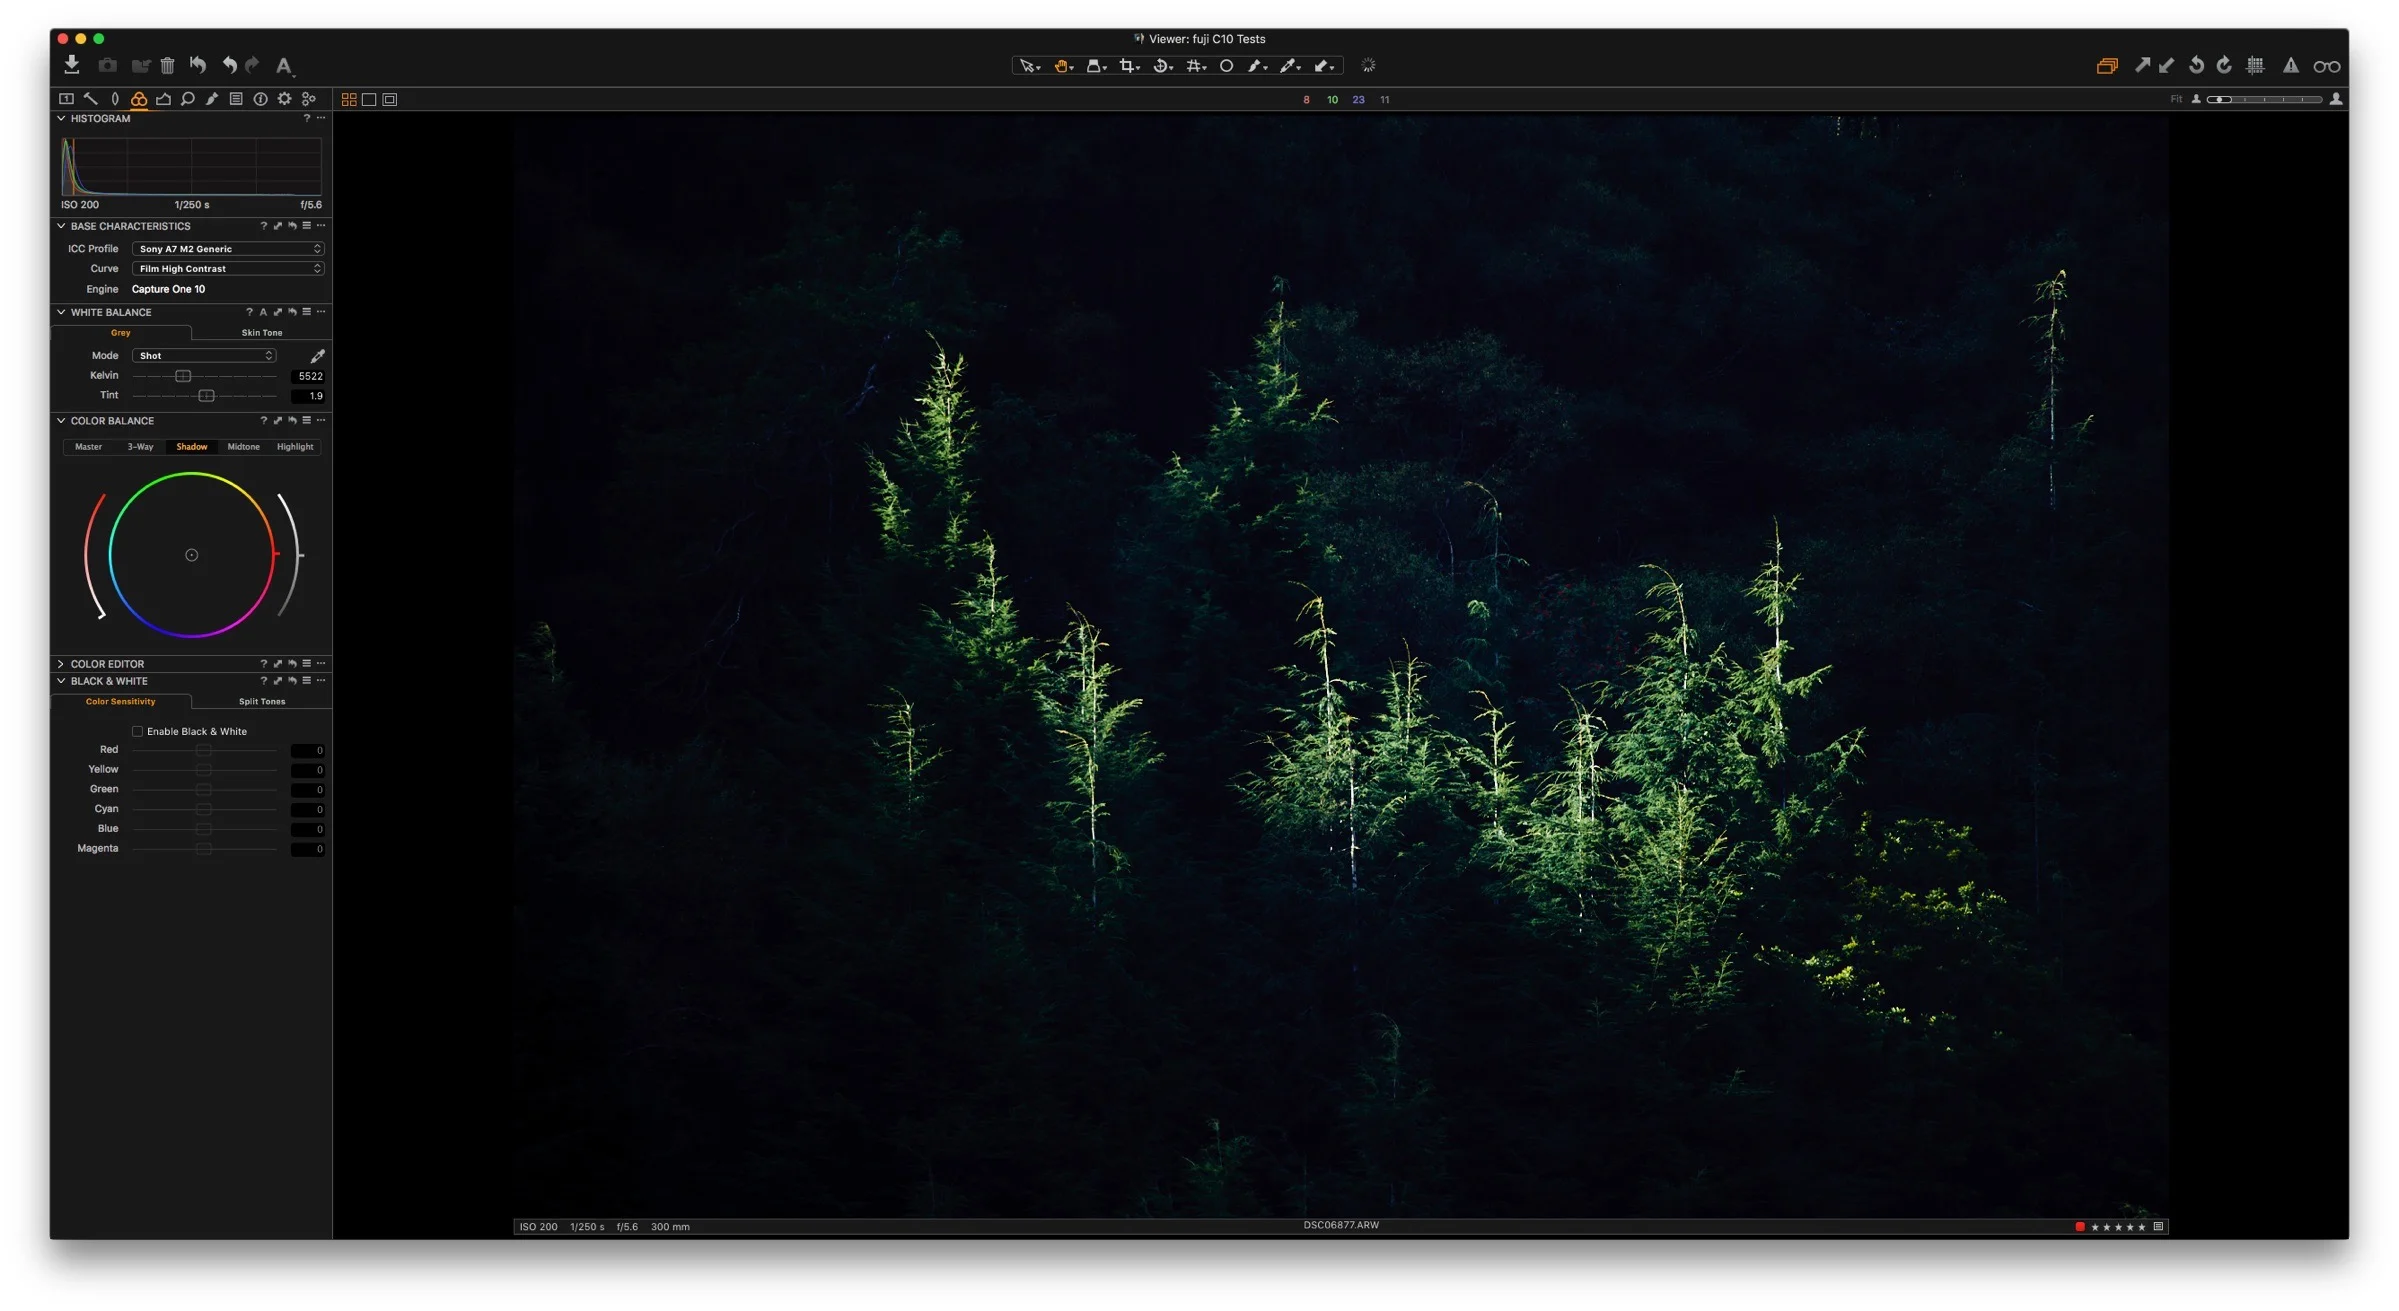
- Base Characteristics:
- ICC Profile: Sony A6000 Generic (or whatever camera you are using)
Curve: Film High Contrast
Colour Balance - Shadow: Drop the value by about 10% to lower the black levels. (See Screenshot)
Details Tab
Sharpening:
Amount: 160
- Radius: 1
- Threshold: 0 - .5 (use a higher value for higher ISO)
Halo Suppression: 0 - 10
Noise Reduction
Luminance: 10 - 30 (raise for higher ISO)
- Details: 30
- Color: 50
As you can see, there’s not a huge difference here, but these few settings, I think make a big improvement. Obviously, you will need to change these based on your own preferences. I think the noise reduction setting is definitely too high by default though. I also thing the threshold, which defaults at 1 gives the image a slightly “digital” look, but, again, that’s just my opinion. I would rather have a small amount of image grain, than a processed look.
For the A7II
For the A72 I do things a little differently. Most of it’s the same, but with the following exceptions :
- Sharpening Amount: 50 - 150 (The default is too sharp in my opinion)
- Radius: .8
- Threshold: 0.5
Halo Suppression: 0 - 30 - This can help if your edges are looking a bit over-sharpened.
Luminance 10 - 20 (iso 100-800)
- Details: 10
Again, these are just my settings. You may or may not like the, but if you’ve been struggling, I hope this gives you a good starting point. I’ve found that there may be a level of Raw pre-sharpening going on with A7 files, as they’re very sharp as is, and you usually need to turn down the default sharpening quite a bit to get them to look natural. I sometimes go as low as 50. The new Halo Suppression can also help if your images look a bit over-sharpened.
For useful tips on setting the black levels in Capture One, see this post.
A few other useful tips
Setting the Les Correction Parameters
If you’re using a Sony lens, the lens profile should be set automatically. However, you may still need to adjust some of the parameters. In the lens correction panel, under the Lens tape, you should see three sliders. Distortion should be set to 100% if a lens profile has been correctly set, although this seems to depend on the lens. I suspect that for lenses with minimal distortion, they have chosen to leave it at zero. The other two, Sharpness Falloff and Light Fall Off are usually set to zero.
Increasing sharpness falloff will attempt to compensate for soft edges by increasing the sharpness in the edges of the frame. It can help a little, depending on the lens, but if the edges are very soft, there’s only so much it can do.
Light falloff compensates for signeting caused by the lens. This is usually set to zero, and depending on what you want to achieve, increasing this should compensate for the lens vignetting. The effectiveness of this will depend on the lens, but it is based off the profiles, and works well in my opinion.
Light Falloff Zero
Light Falloff 100%
Another thing that you may want to tweak, depending on the image and the lens is the purple fringing control. If you have some fringing in your image that isn’t been fixed by the normal chromatic aberration controls, then adjusting the purple fringing slider may help. Despite the name, it works on colours other than purple too.
If you’re working with adapted lenses, you may need to set the profile manually. If the lens you’re using doesn’t have a profile, you’ll have to use the “generic” one. With this set, you may have to tell it to analyse the image to compensate for Chromatic Aberration, but this is easy. Just click on the chromatic Aberration checkbox and it will analyse the image.
Structure vs Sharpening
One of the things that I like to do sometimes too, is use the Structure slider in the general exposure tab to add additional sharpening to an image, rather than turning up the sharpen amount. Using the two in combination lets you add a good bit of detail to your Image.
Beware Command + D
One of the things that gets me a lot in Capture 10 is muscle memory from working in Lightroom. There’ sone command specifically that you have to watch out for, and that’s Deselct All. In Lightroom, this is Command + D, but in Capture One that command will set all your selected images to process, which can get a bit messy.
Upgrading from a previous version to 10 - do this first.
If you’ve upgraded from a previous version to Capture One Pro 10, then the one thing that I highly recommend is resetting the user interface. The’ve added a lot of stuff, and some things have been moved around, but if you’re using an old workspace, then you may be missing loads of functions. This is especially true if you’ve been using Capture eOne for a few versions. I found that I was missing lots of additions to the layers panel, and also the dedicated spot removal tool, that I’m not even sure how long has even there (as opposed to the heal layers - it should be at the bottom of the lens correction panel, if you’re looking for it).
Would you like to know more?
There’s lots and lots more I could write about this topic, and so, I was wondering if it was worth my while doing a guide specific to capture one for Sony shooters? It would be somewhat like my Capture One guide for Fuji shooters, although laid out a bit differently. If this interests you let me know and I’ll consider it.
Help Support the Blog
If you like this post then you can see more of my work on Instagram, Twitter and Facebook. I also have a YouTube channel that you might like. You should also check out my other Photography Project: The Streets of Dublin. If you want to get regular updates, and notices of occasional special offers, and discounts from my store, then please sign up for the Newsletter.
All of the work I do here, and the information on this blog is done entirely free of charge and takes quite a bit of work. I want to spend more and more time on this blog, and offer more and more of this kind of information, tips and so on. All of this is funded exclusively through my Digital Download store, so If you like what I'm doing here and want to show support, then you can do so by buying something from my Digital Download Store where I have Lightroom Presets, and e-books available for download.
If you're a Fuji X-Trans shooter and Lightroom user, check out my guide to post processing X-Trans files in Lightroom. I also have a guides for processing X-Trans files in Capture One and Iridient Developer.
For Sony Alpha shooters I have a new guide with tips on how to get the best from processing your A6000 Images in Lightroom.


